Maybe this can go here? I can’t post in the How-To library (probably a good thing).
Anyways, prepping my car for a few upcoming track days and trying to tackle some older items that I have been ignoring since they haven’t posed a problem yet.
@FizzGiGG since you have a lot more experience on track and modding than most, point out any other items that I may be missing.
Coolant bleeder screws on rear of engine. (Have the replacements from Alfissimo)
Coolant bleeder/hose bypass for turbo on driver side of engine (just remove section and re-use old hose? Buy 68530460AA which is newer hose revision that does not have this section?)
Going to grab that Damon oil catch can.
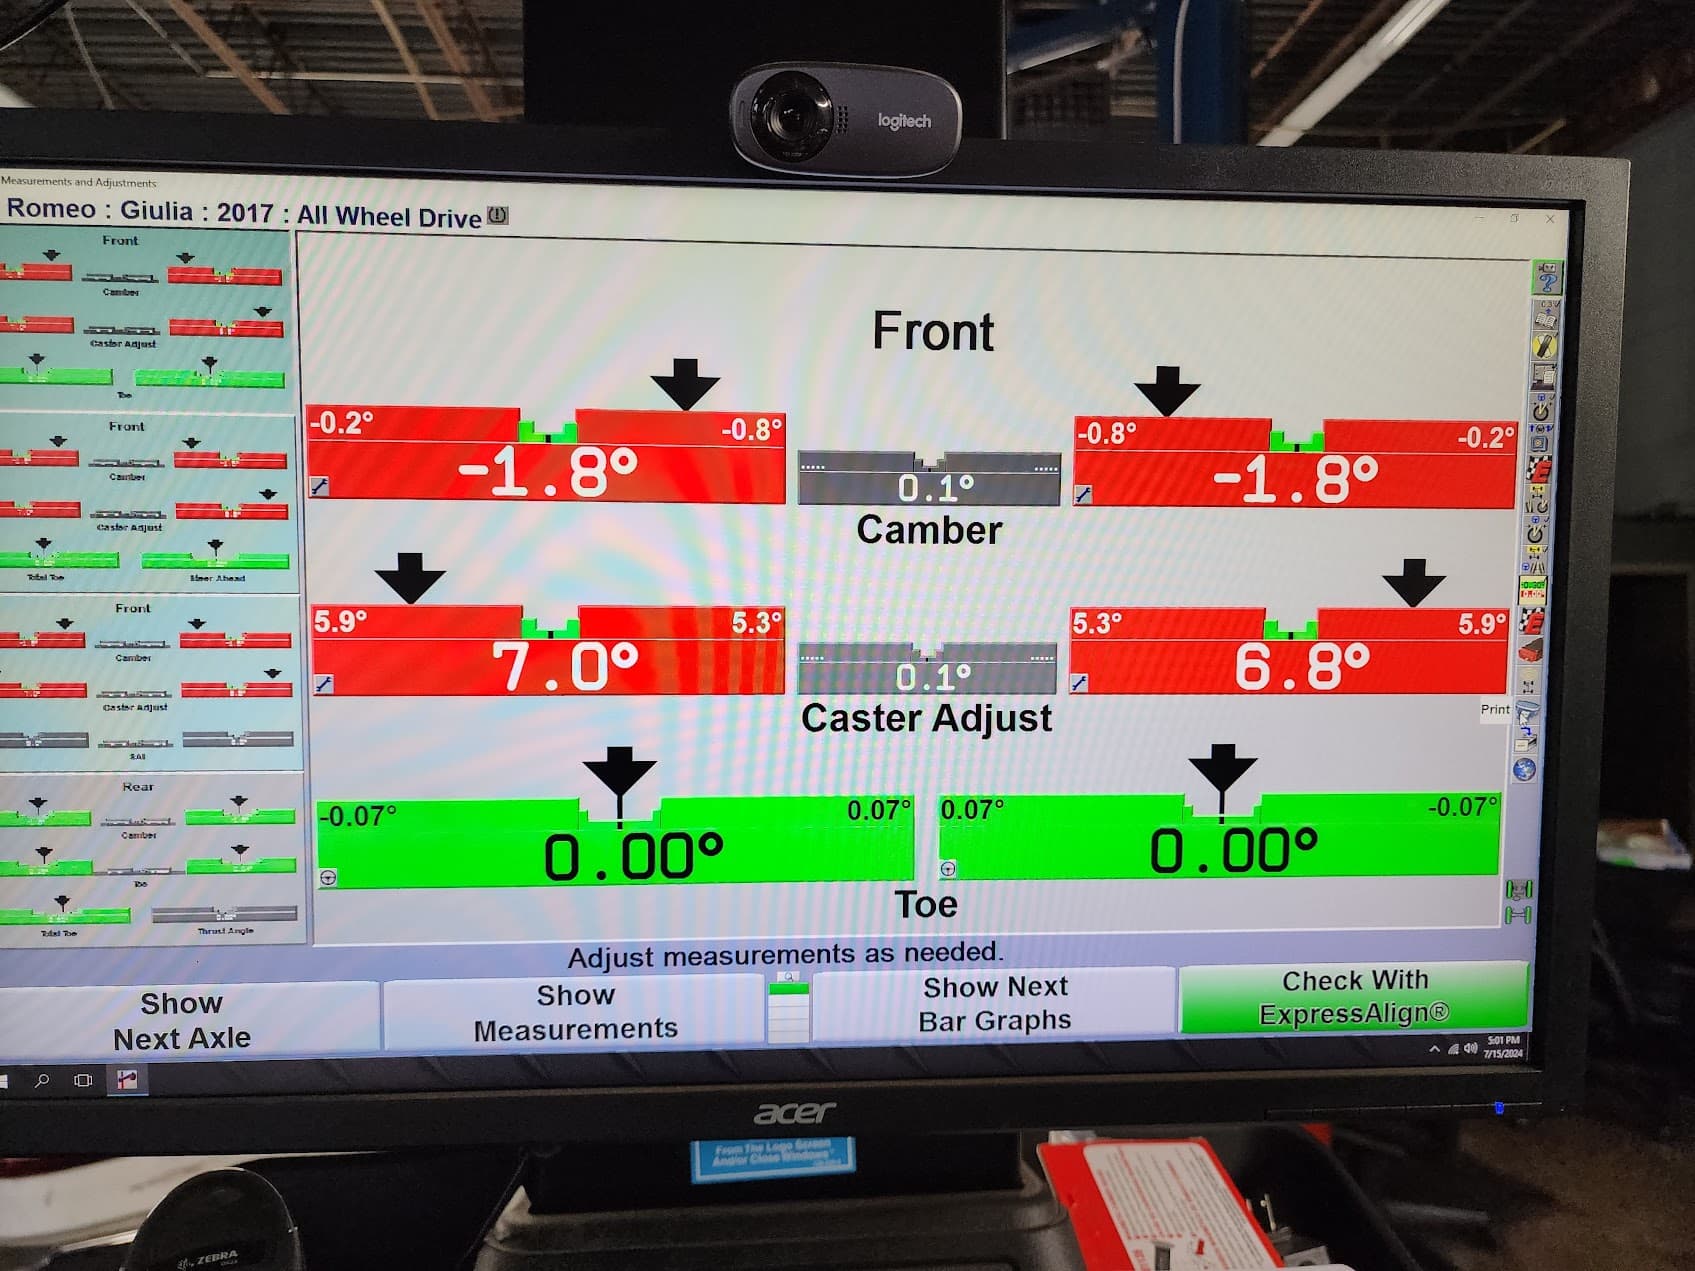
I have the Ideal camber kit and want to install that. I read online about the GMS kit that with Q4 should not do more than -2.0 since it would strain the front CV? How much camber you running?
So that is what I plan to tackle beyond my normal prep of:
Fresh oil change (going with Rowe 0w30 SP this time)
Fresh brake fluid flush (Motul RBF 700)
Tracks pads (Raybestos ST-43)
Brake pad heat shield (Pyroclast from Alfissimo)
Removed factory brake dust shields
Tarox F2000 rotors
Tarox SS brake lines
245/35 or 245/40 tires (currently finishing off a set of Yokohama AD08R)
Not sure if we’re talking about the same thing, but… I would replace both hard coolant lines with 5/16" fuel line rubber hose along with using fuel line hose clamps. Re-use the ends. I believe they should hold up as they are something like GF-35 (35% glass fiber reinforced plastic).
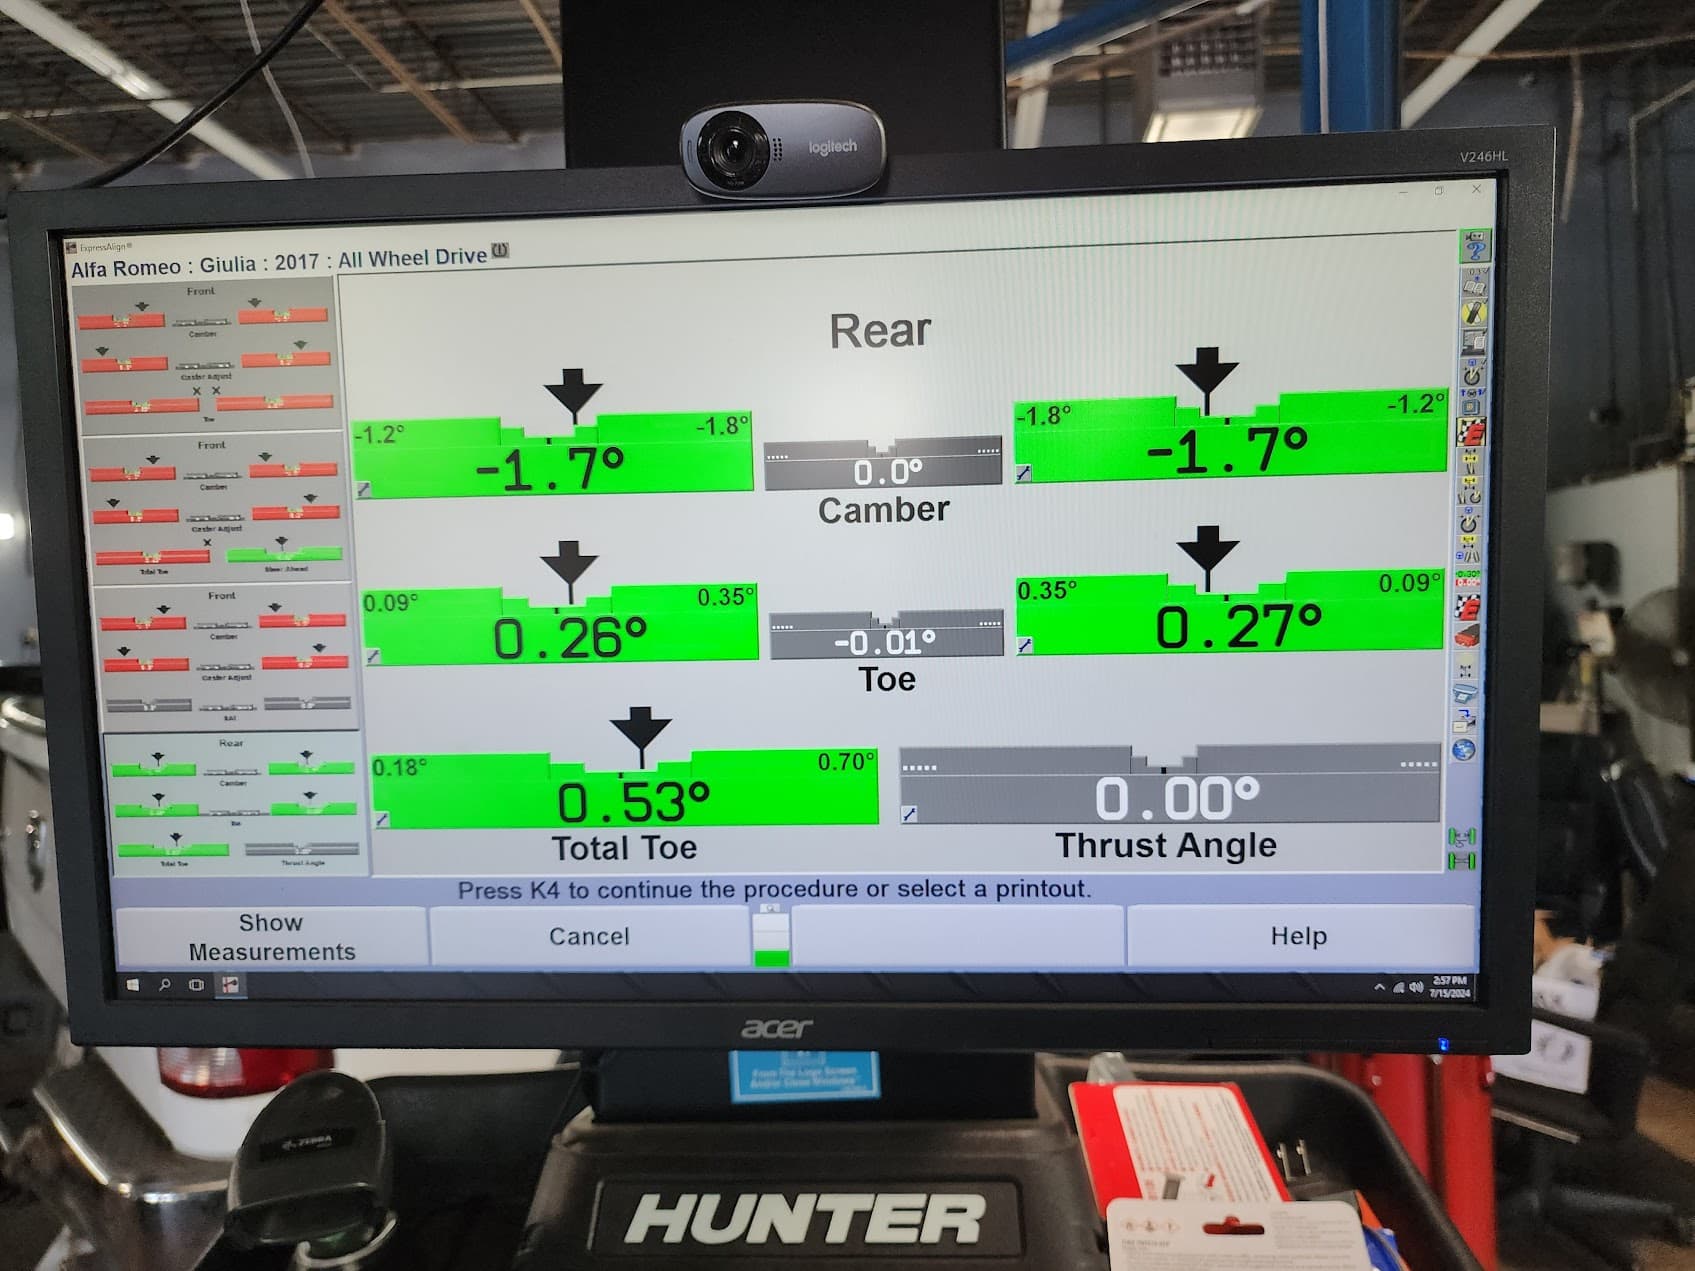
-1.7° or so, and I can hear the CV kind of yell at me near full lock. My 2018 Q4 ride height may contribute to this as I don’t think the half shafts are parallel with the ground.
Talking about that bleeder that is not on the 2022+ engines.
What other hoses have you replaced with fuel lines?
My 2017 is lower than your 2018, but hopefully camber won’t cause too much strain. I would love -2.5, but think I will stick to as close to 2.0 I can get.
Mounted my Yokohama AD08R. Still have great tread on them even though they have been through a few track weekends. They are 2018 rubber though, so doubt they have much traction left in them.
While doing the tires, I replaced all my relays in the fender with the updated part number. I had the turbo intercooler pump code (U1008-00 - LIN serial line) just pop up the other week AGAIN, so while in there I just replaced everything so I shouldn’t have the issue again hopefully.
Also found some more missing clips, bolts, and dangling harnesses not in their mounts. All from the stupid dealer who sucked at replacing my engine.
Next steps is installing the catch can this weekend and doing the pads and fluid next week.
I want to install the hybrid turbo I have been sitting on, but warry of having some codes thrown that I cannot clear (wastegate). Track day is July 31, so will probably wait until after.
Lol I hear ya man. That’s what I had to do last time. My brother has an Autel tool and it has some waste gate procedure on it, wonder if that does anything?
Anyways, I installed the Ideal camber kit and did an alignment. According to the instructions, “For approximately -2 degrees of camber we recommend using the 4.7mm shim.” That only got me to like 1.4. I used every shim on driver side and nearly every shim on passenger side to get me where I am at. I have a Q4, so maybe that is the difference? I don’t know, but I got it where I want it at least.
I haven’t figured out the secret sauce, but I I tihnk that the various ride heights we get between 2017/2018 Q2/Q4 all play with how much shims affect camber. I have a spacer that’s about 7 or 8mm thick and I’m just below your numbers at -1.7° / -1.8°.
It may have to do with where the “LCA” is at in its arc of travel. Adjustable UCA’s are the best but most expensive way to get more negative camber… if you need it.
Yeah I agree. I don’t plan on doing anything else as this is a daily car and not a QV so I don’t care to do much more. I may switch to the GMS or Alfissimo bushing to resolve the caster issues in the future, but again, not too concerned yet.
The Ideal kit comes with 0.8mm, 1.2, 1.5, 2.3, and 4.7mm shims. I have all the shims on driver side so 10.5mm and all but the two smallest on passenger side so 8.5mm. I remember you telling me you used 8mm so I tried that first but that only got me to like 1.6°
More info on brake ducts please?! Brake cooling is the last major mod I really want.
I knew you did the rear sway. Did that make any difference? My rear-end has always been rock solid (I have the performance packages so LSD already). Like the rear has never really stepped out on me without purposely trying to do it. Front end is where my car has been needing more grip, but camber should resolve that for the most part aside from wider wheels/tires.
As for the brake ducts, I see a bunch of articles on them and yeah, they are dirt cheap. Gonna snag a pair and see what I can do. I have the 1 piece rotors so that will be a little different.
Hmmm so when I turn full lock to the left, there is a very noticeable vibration. Definitely result of the camber bolts. Don’t think it’s cv axle since it does it even when not moving. I’m assuming it’s the steering rack.
That’s probably it, and the exact thing I notice too. It happens at extremely slow speeds. I’m used to it now, and I don’t ever have that occur due to not turning the wheel that far.
So far no negative consequences after tens of thousands of miles.
YMMV though.
It’s one of the reasons I want adjustable UCAs. Split the difference between the LCA and UCA for getting neg. camber.
Good to know I didn’t screw something up. Yeah I just won’t turn the wheel that extreme. Thankfully it is at the very end of the steering, so only in a parking lot would I ever be causing it.
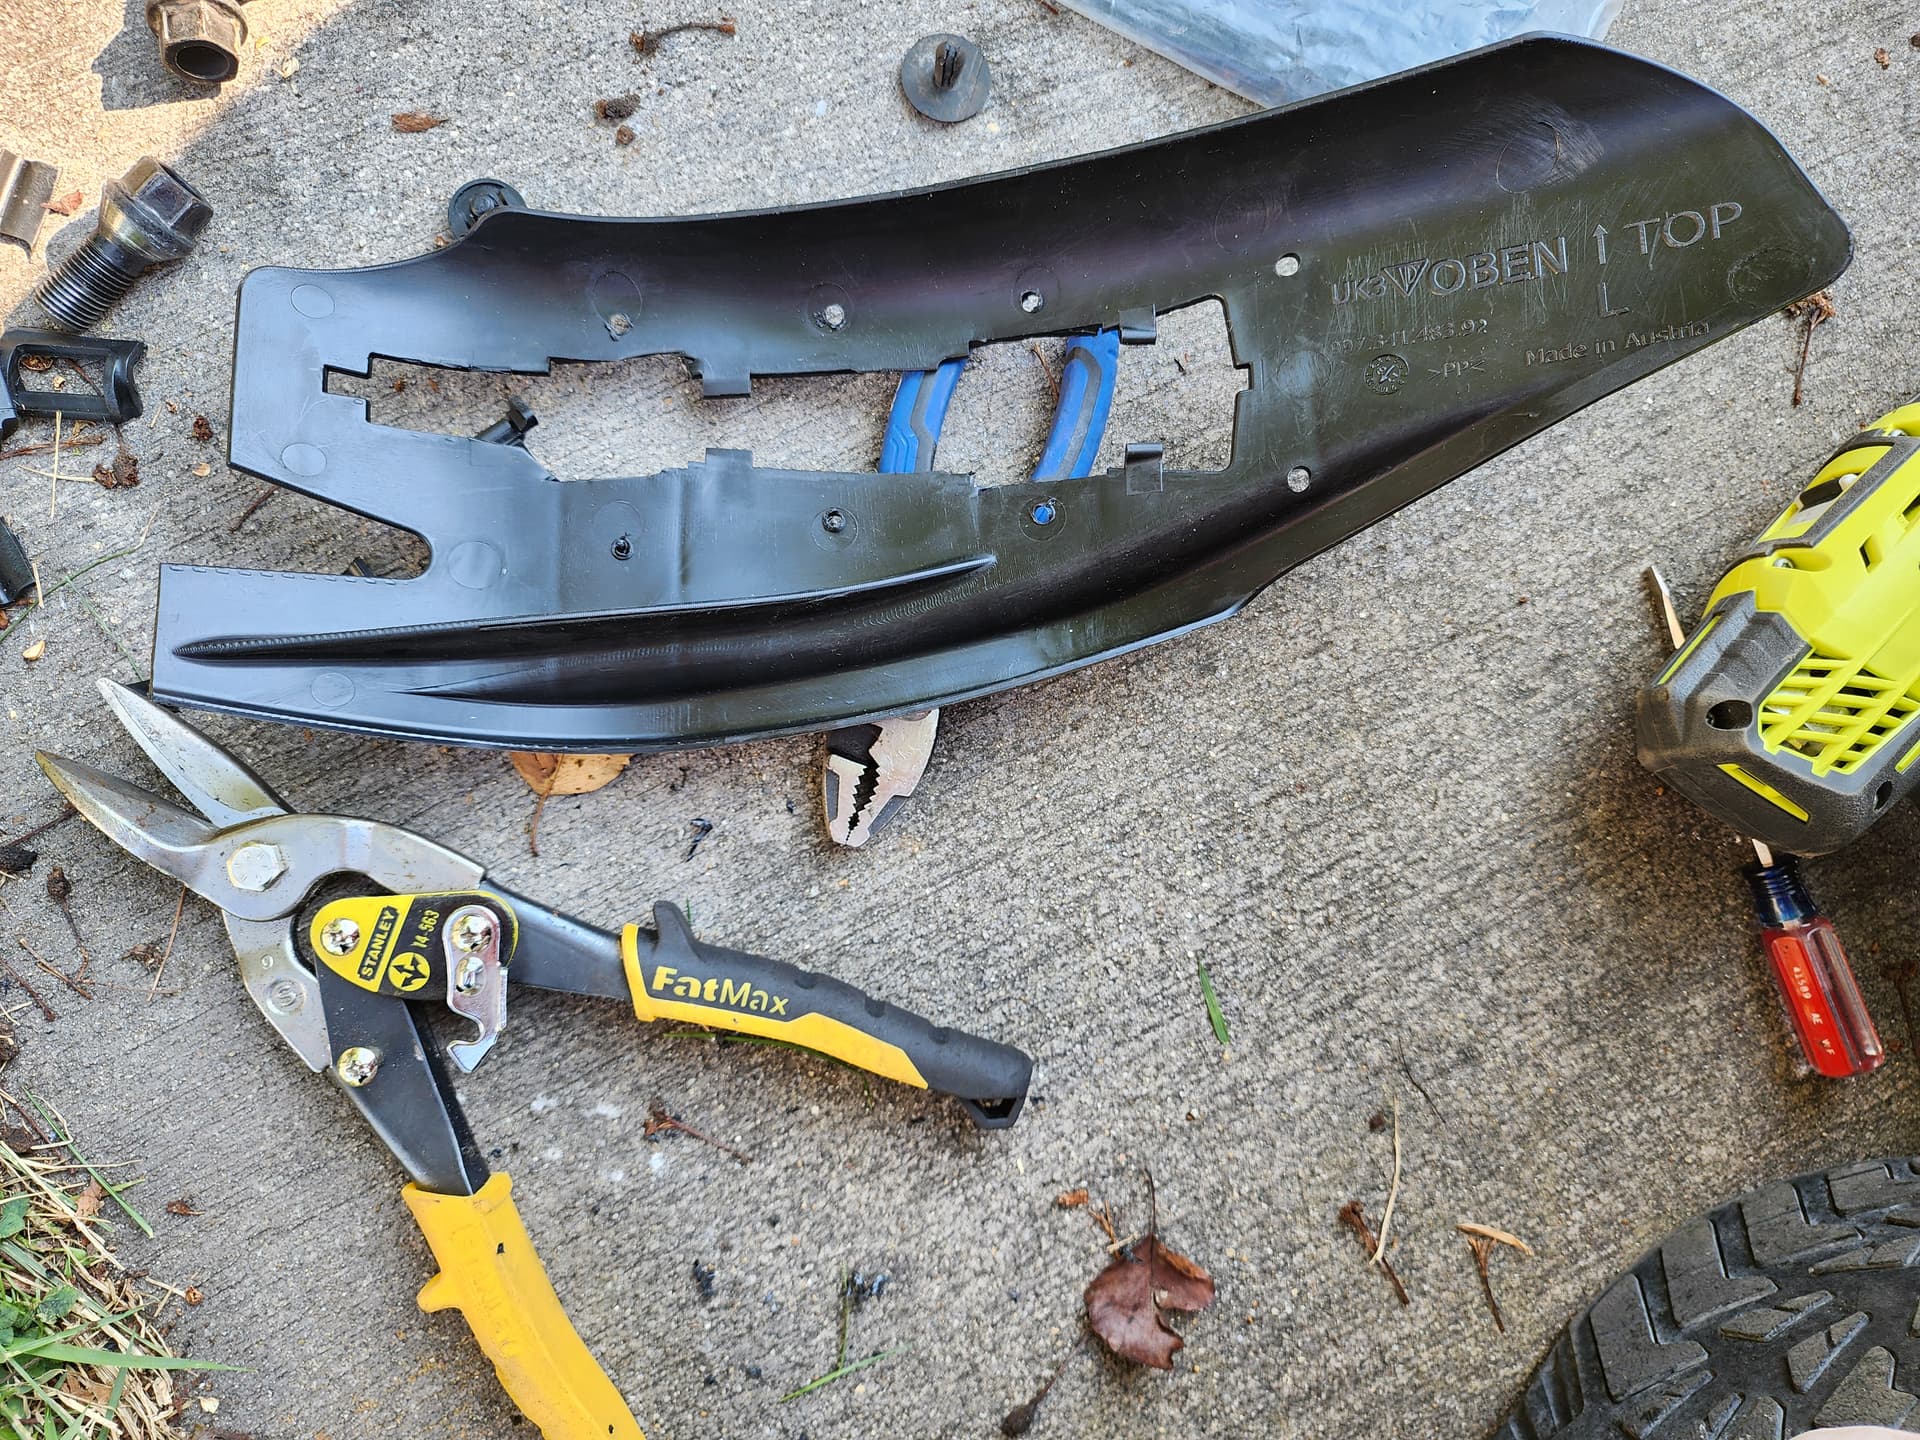
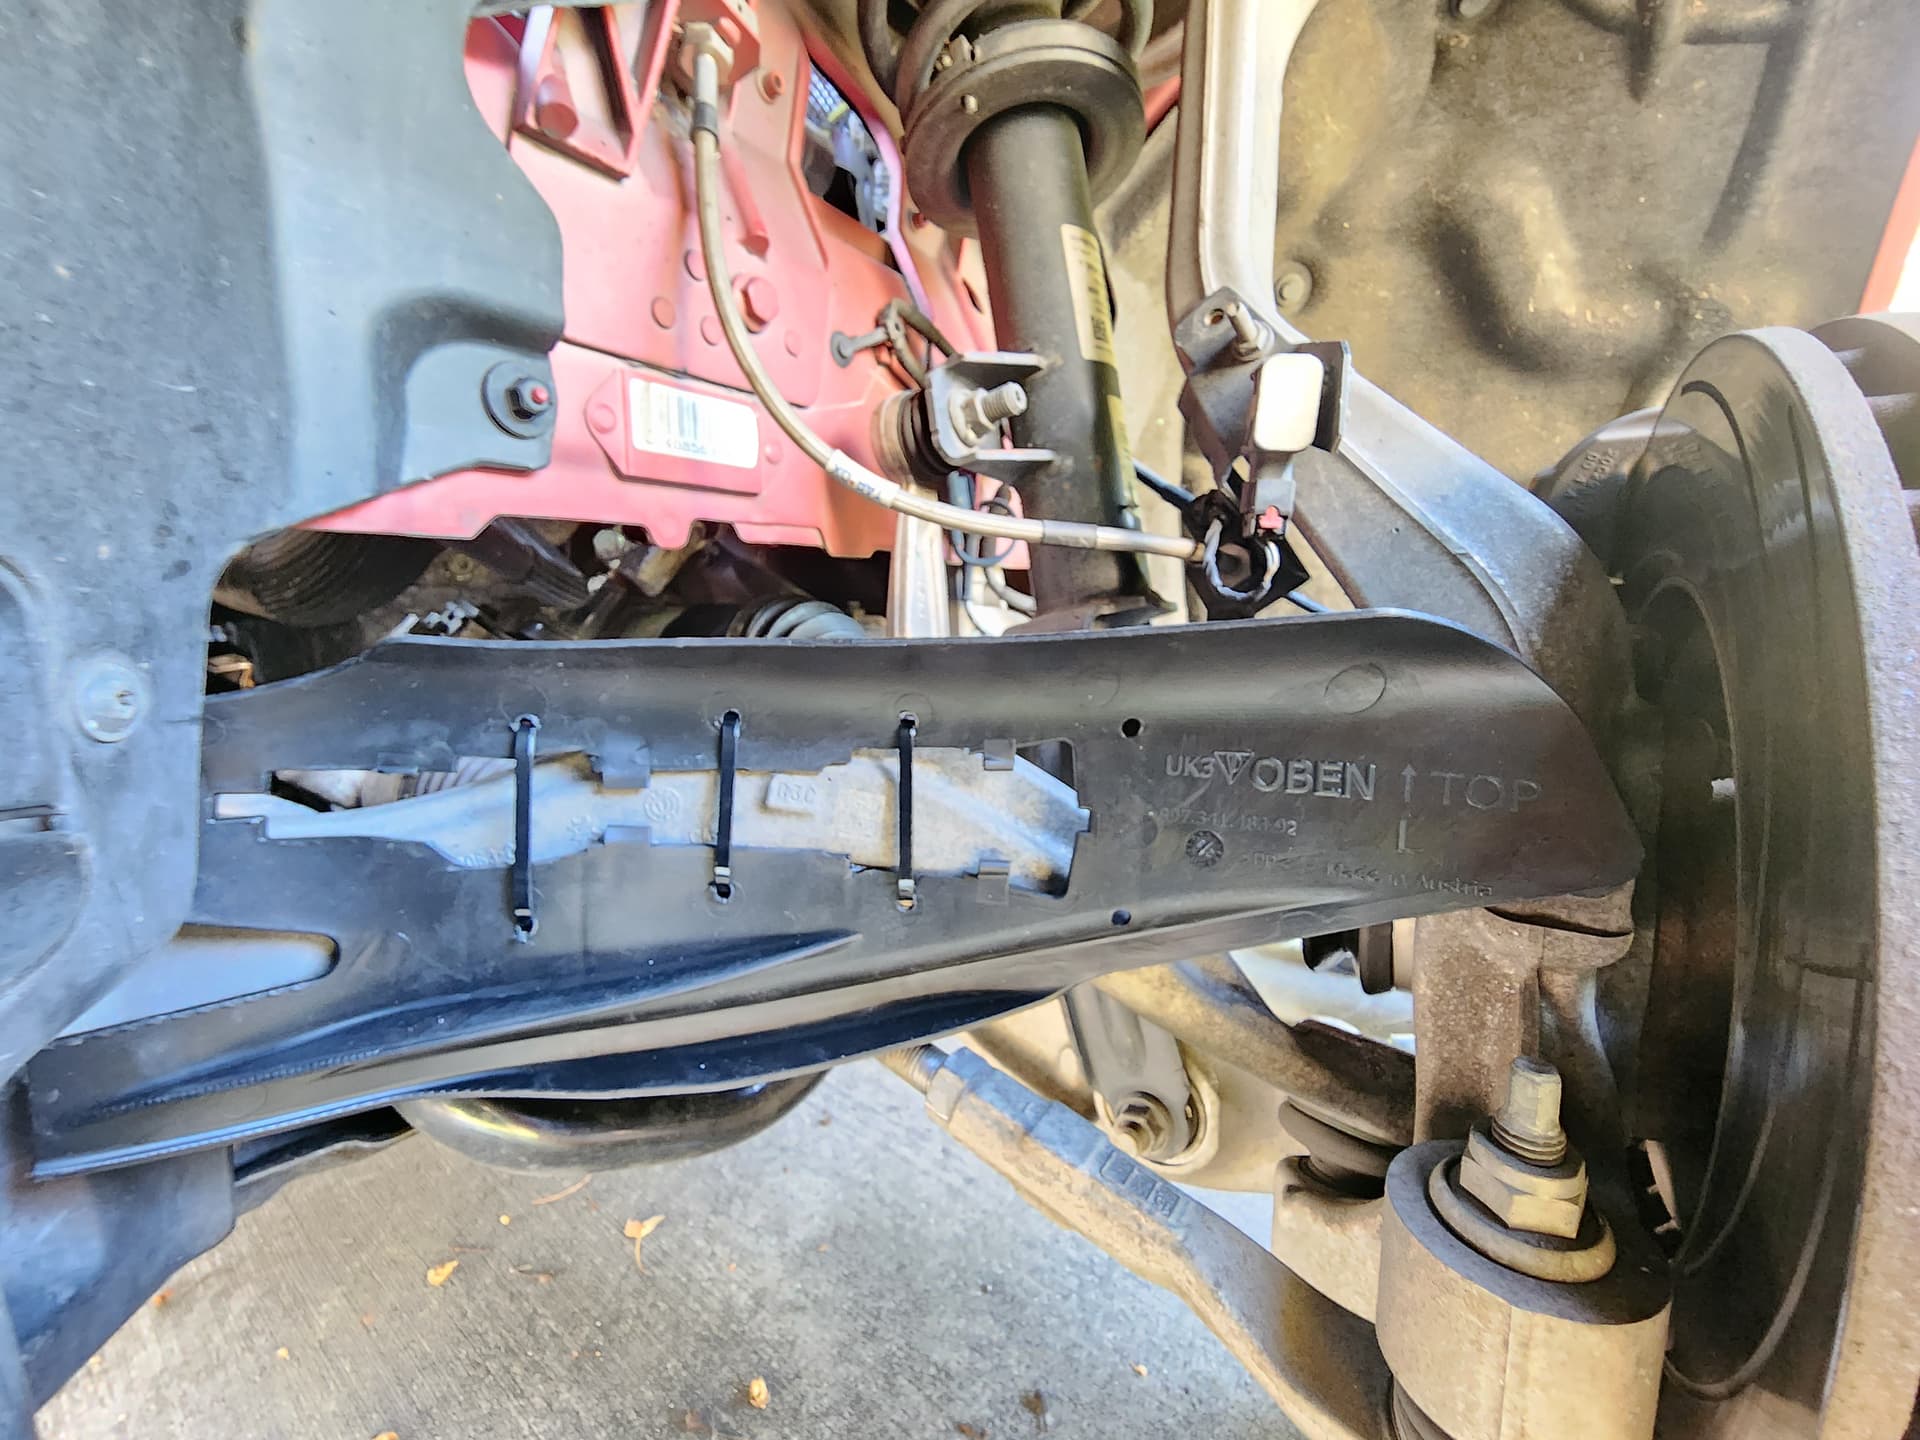
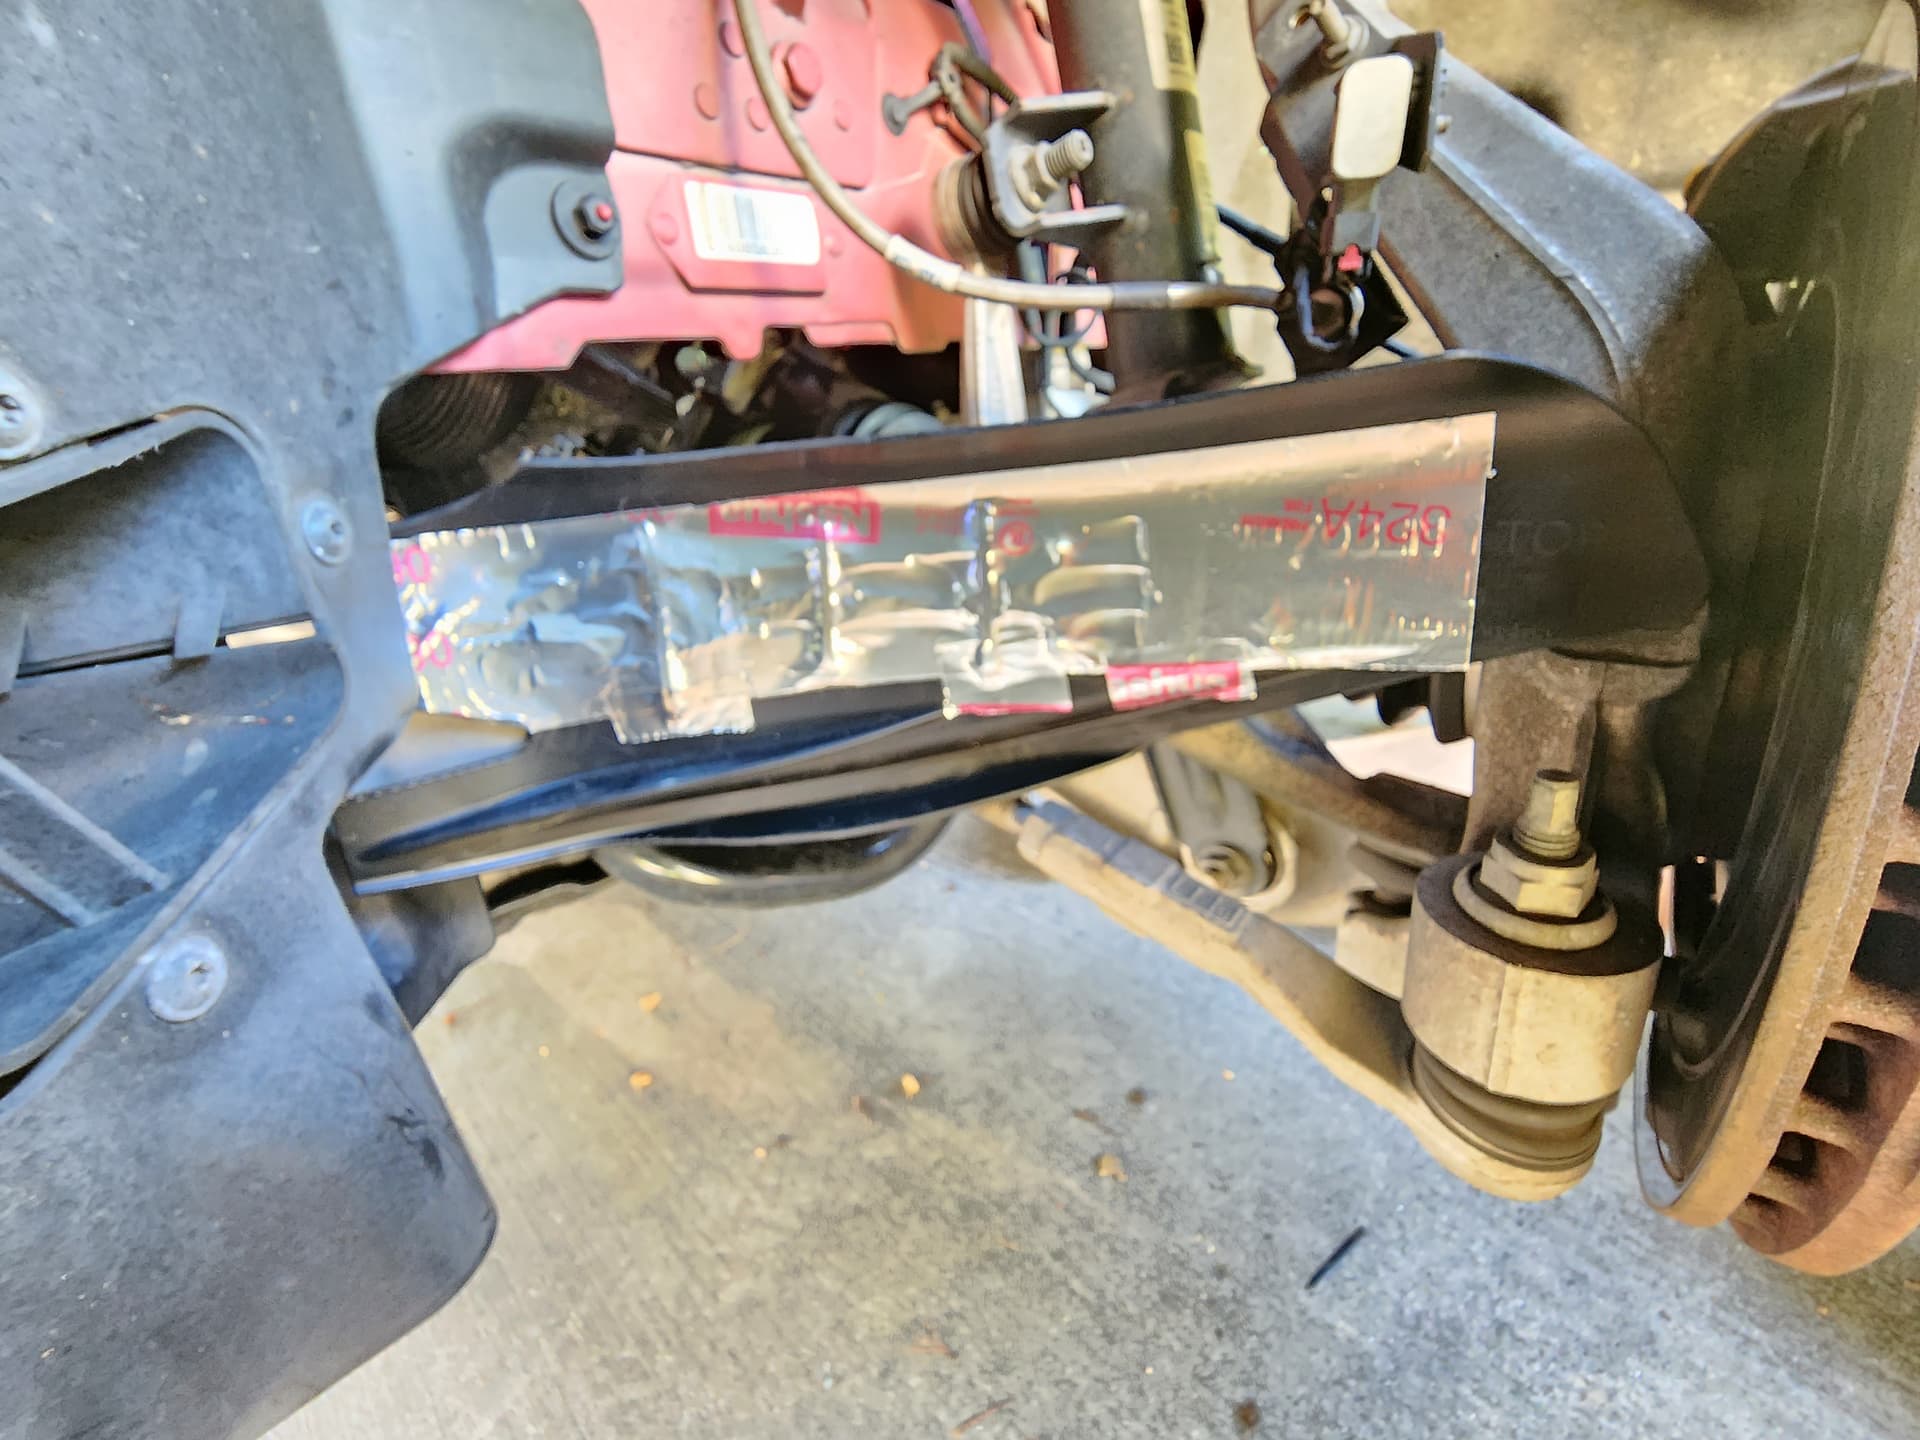
I was up late in bed unable to sleep due to the heat mulling it over. I think it does have to be the CV axle. We are not hearing of any QV or non Q4 people complaining about the issue, so that rules out steering rack for me. With it only doing it turning left I think it has to be the front left axle. That is the really long one that has that bolted on support as well.
Yeah maybe the UCA and LCA bushing will be the final piece.
And tonight I finally flushed and bled my brakes with Motul RBF 700.
My brother is rushing to finish his NSX as he is joining me Wednesday for the track night. Last night I did his brakes and installed SS lines and ST-47 fronts and ST-43 rears.
Tonight I helped him install the transmission as he had to replace input shaft bearing.
He’s currently rebuilding the axles and hopefully getting it all back together tonight…