There comes a time in all cars’ lives when a replacement battery is needed. On our Giulia’s it’s a crapshoot as to when that may be. I am lucky enough to get 6 years out of mine.
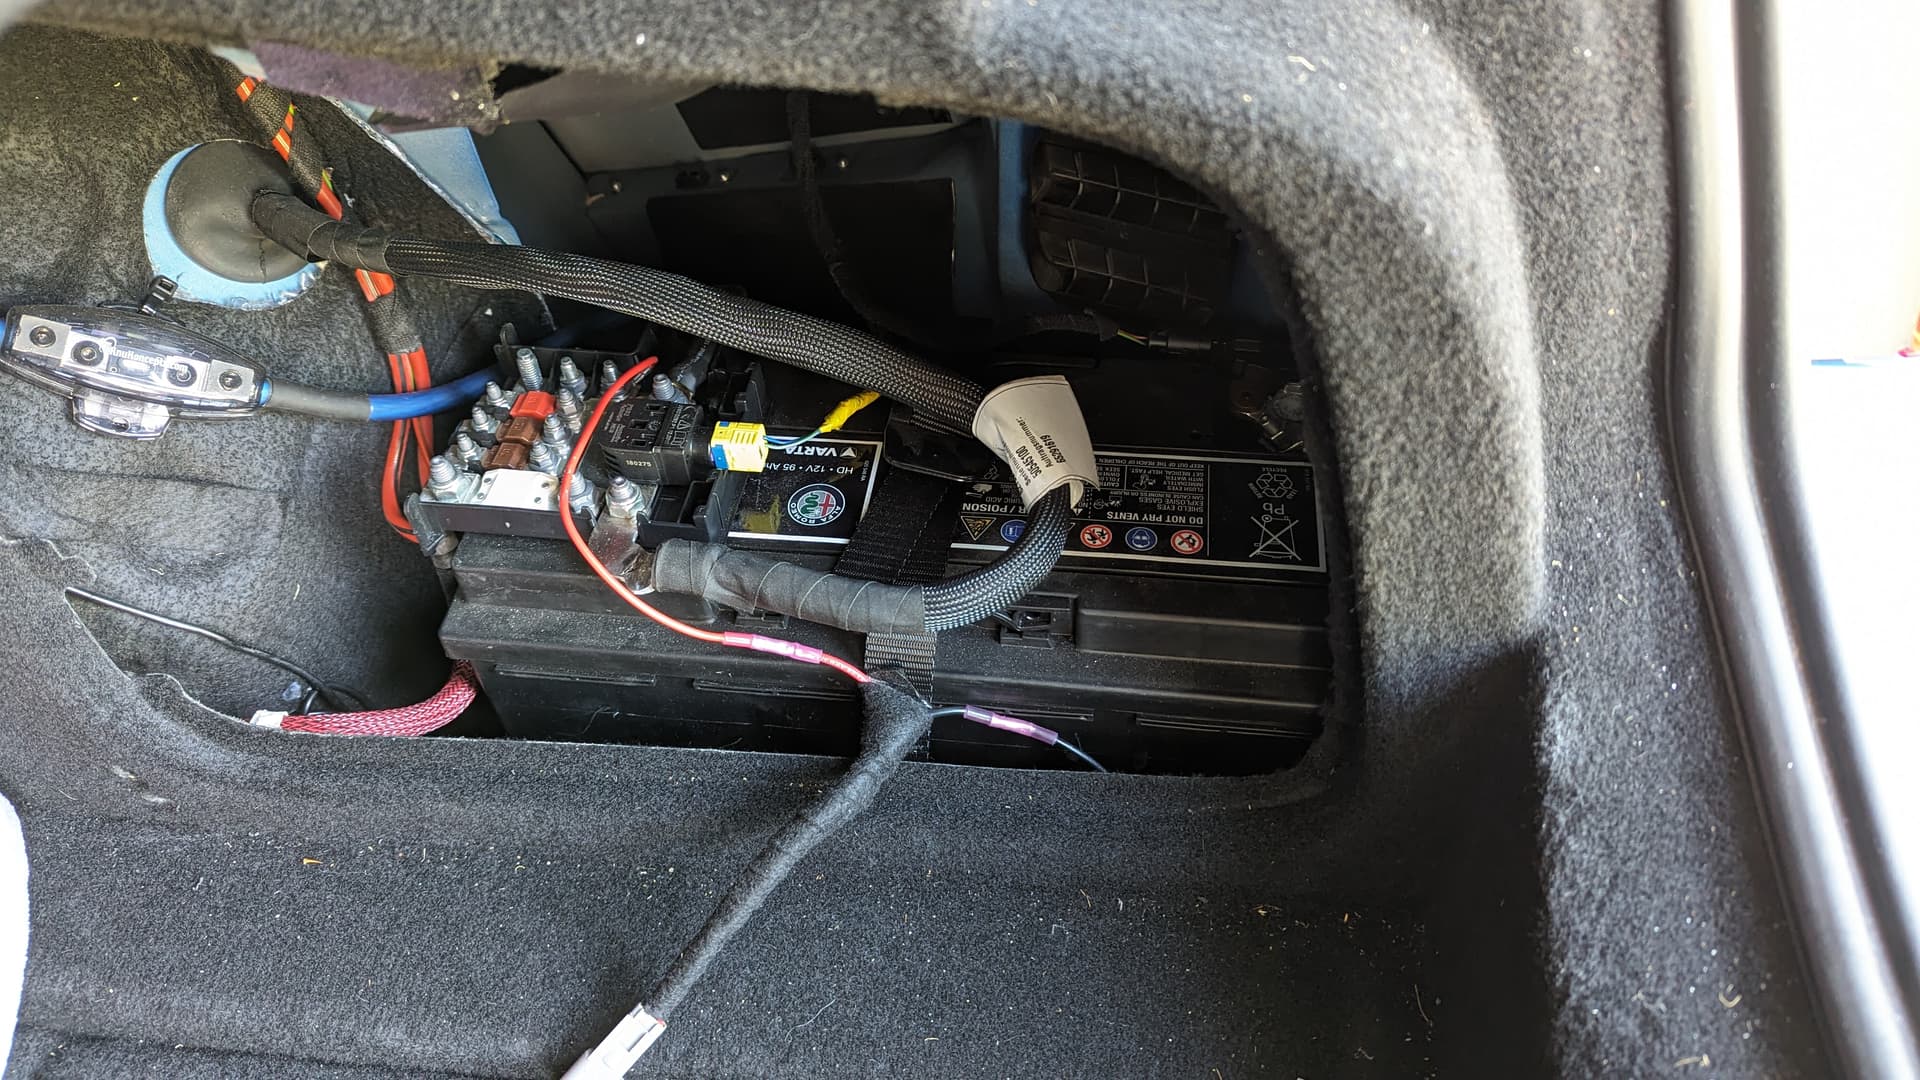
In theory it’s a pretty simple procedure, but with the very tight confines of the battery compartment, and the reduced working space in the trunk, it can be a little bit difficult to get out.
NOTE
Before replacing the battery when you believe it’s going bad, make sure that you aren’t stuck in a charging mode that only does minor “top offs” instead of a full charge. @Barbuck has this great document that goes into the charging system functions in extreme detail. It’s a lengthy read but well worth it.
Symptoms
Potential symptoms of a bad / low battery are:
- Car will not crank the engine fast enough to start / lights dim when trying to start the vehicle
- Rear Defroster/Demister not working
- Auto Start/Stop non-functional
- Other non-critical vehicle systems not working
Battery Requirements
- Size: H8
- Recommended:
- Older than 03/31/2019: EFB
- Newer than 03/31/2019: AGM or EFB
- 95Ah / 900 CCA
Tools
- 10mm socket (3/8" drive)/ ratchet
- 3/8" drive ratchet
- 3/8" assorted length extensions
- 10mm combination wrench (i.e., spanner) (ratcheting type is a bonus)
Instructions
Battery removal
-
Remove battery compartment cover and set aside
(I have extra wiring, so disregard if you don’t see that on your vehicle) -
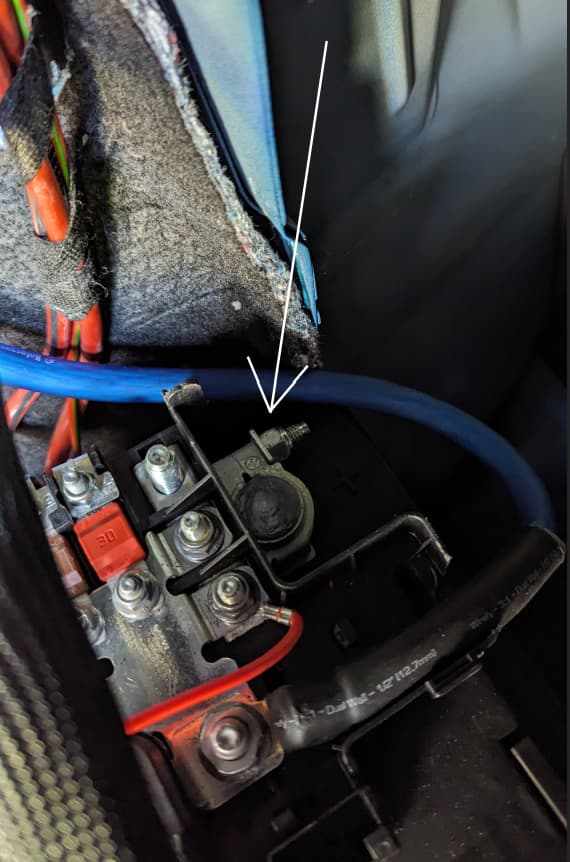
Disconnect negative battery post quick disconnect. So not disconnect the IBS first. This is performing a reset that is required for a proper learning process.
-
Remove battery post clamp/IBS using short extension and 10mm socket and move assembly out of the way towards the front of the vehicle by the wheel well
-
Remove positive battery post fuse block by removing the post clamp using the 10mm combination wrench and also get that assembly out of the way so as not to impede the removal of the battery
(Disregard big blue cable, that’s for my car audio amp) -
Remove the lead acid flooded battery vent tube from the battery. This is located on the right side (rear of vehicle) of the battery. Just twist and pull. Place it out of the way like you did with the other stuff.
-
Disconnect the battery strap
-
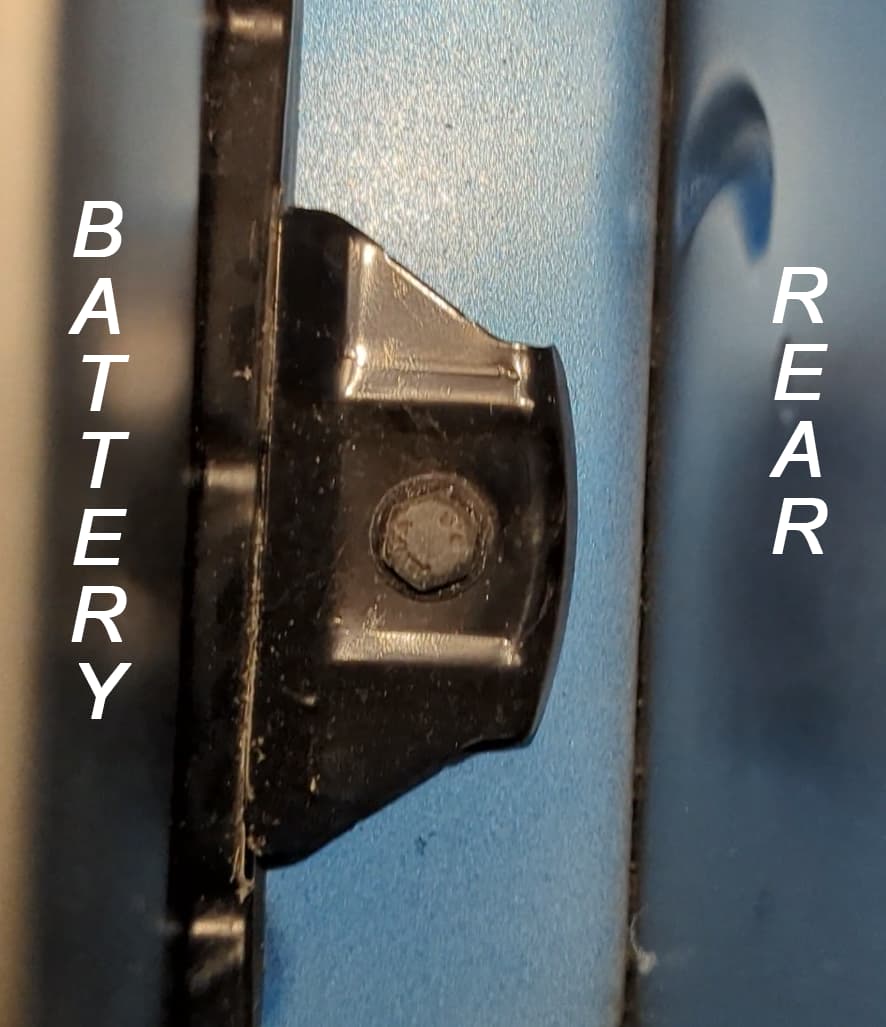
Remove the 10mm bolt that holds down the battery retention clamp located on the rear side of the vehicle at the bottom. It’s a very tight space. Start with just the 10" extension(s) with the 10mm socket installed in order to find the bolt head. Once you have it connected, install the ratchet onto the extension and loosen the bolt. I was able to loosen it enough to get the battery out without having to completely remove the bolt. This will help a ton when re-installing.
-
Now the fun part… grab the two handles in the center of the battery with both hands, and with one leg in the trunk, pull up and tilt the battery and slide it out. It should be safe to tilt the battery a little without anything wanting to spill out. Be careful. You may need to wiggle the battery at first in order for it to work itself loose from the clamp.
New Battery Preparation
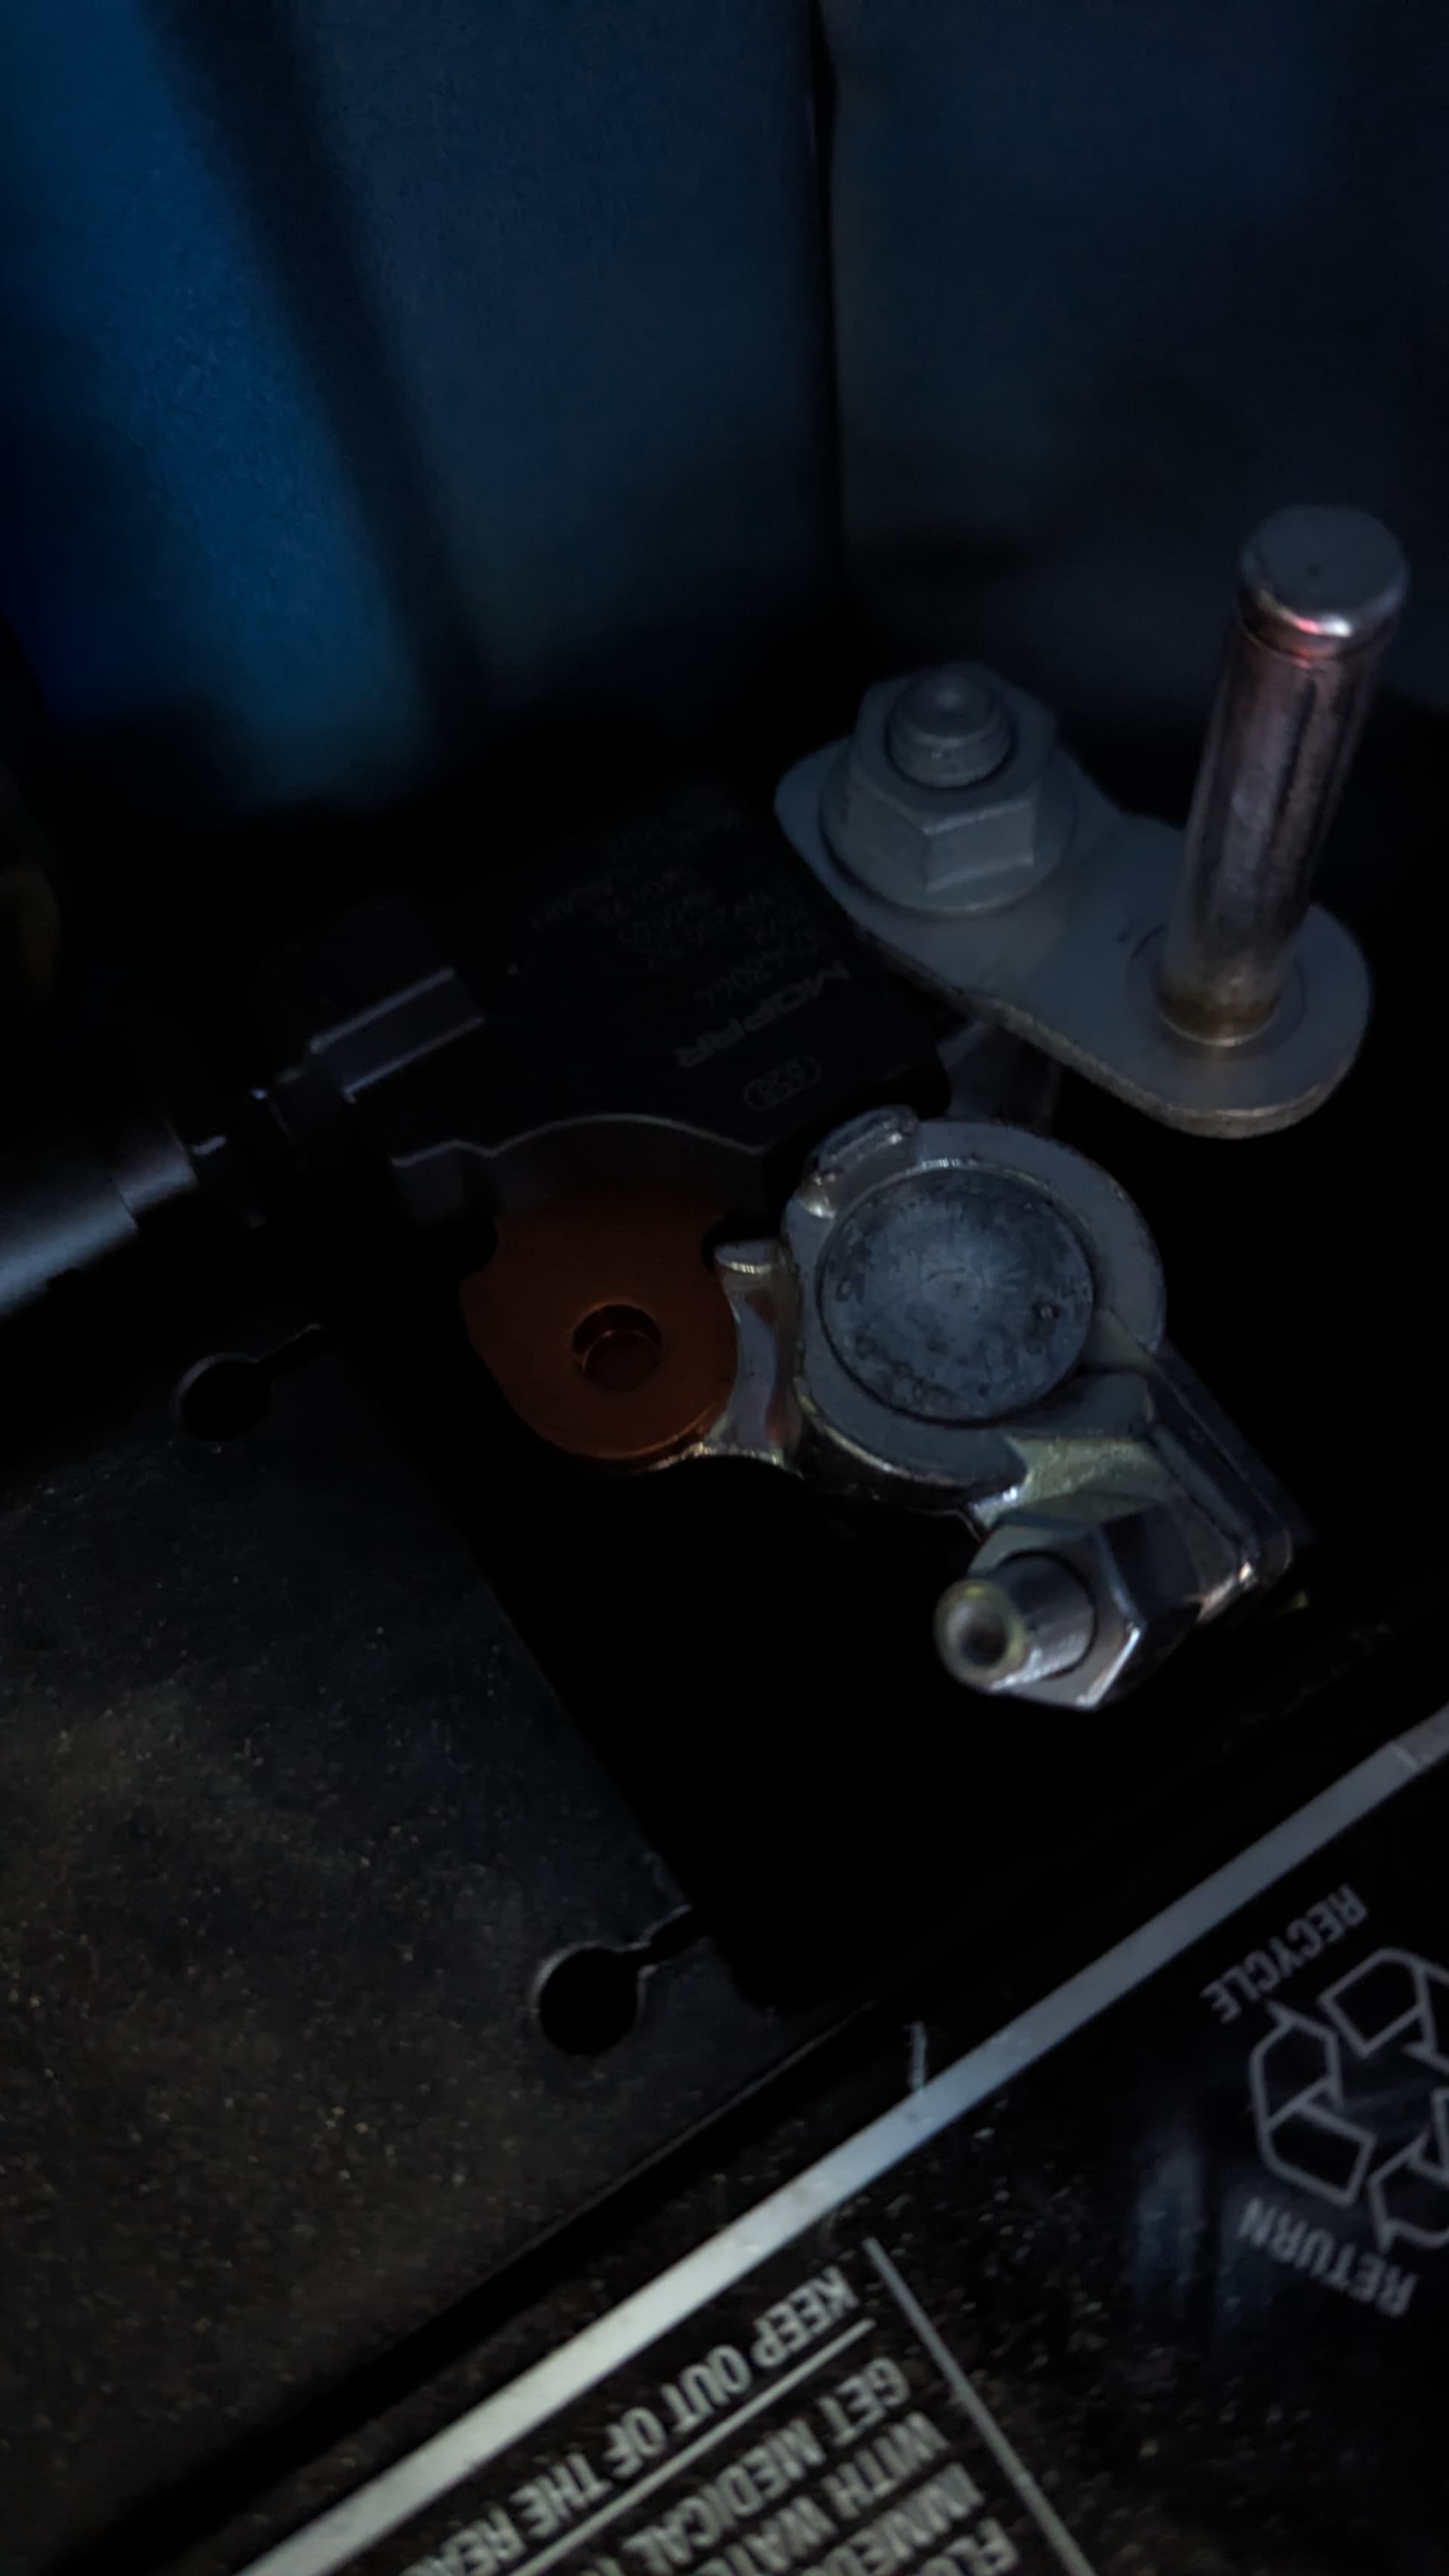
When I went to install the new Interstate AGM H8 battery, it turns out that the negative battery post on the OEM Varta battery is smaller than normal, by quite a bit.
In order for the negative post clamp to fit on the new battery post, you need to loosen the clamp bolt/nut and spread the clamp apart enough to get it all the way on to the post, so the battery post is proud of the clamp. This ensures maximum / optimal contact of the clamp with the post.
Unfortunately, I do not have pictures of this. I lucked out and my 90T GearWrench 3/8" ratchet handle was the perfect diameter to spread the clamp apart enough. I inserted the handle into the clamp post hole, placed it on my bench vice between the jaws with the end of the ratch poking out between the jaws with the clamp supported BY the jaws. Whacked the top of the ratchet a few times with a dead blow mallet, so as not to wreck the chrome finish on the ratchet, and it spread apart nicely. Make sure the nut/bolt do not inhibit the ability to spread the clamp apart.
Also, clean the positive and negative clamps to remove any corrosion or schmoo that shouldn’t be there. A light coating of dielectric grease is recommended.
Battery Installation
This is obviously a reversal of the removal procedure, so I don’t think I need to get too deep into the weeds.
-
Install negative post clamp/IBS on to the battery prior to re-installing the battery into the vehicle. This is just an easier way to make sure it actually fits the post. Adjust as needed
-
Clear the area in order to get the battery into its place without catching any wiring
-
Position the battery retention clamp so the battery can get fully into place
-
Lift/slide/heave the battery into place (both handles, both hands, left leg in trunk, lol)
-
Verify that the battery hold-down clamp is oriented properly, and tighten with 10mm socket/ratchet (Check by trying to move the battery. It should be very solid)
-
Re-install battery strap
-
Reinstall battery vent tube (is this needed with AGM?)
WARNING: Make sure that when you are reconnecting any battery that you connect the positive clamp first, no exceptions. Then you can work on the negative side connections. This is the safest way. If you connect the negative first, you run the risk of your wrench/ratchet hitting a body panel or part that is grounded, and sparky fun time ensues.
-
Install the positive battery post fuse block and clamp it onto the post using the 10mm wrench, verifying that the clamp is fully seated on the post first. The positive post size looks to be the same as the OEM battery, unlike the negative post size debacle.
-
Install the plastic fuse block cover
-
Reconnect the IBS harness connector and then connect the negative cable quick connect.
Clear Warning lights on dash and reset clock
-
Start the car and turn the steering wheel from lock to lock and back to center
-
Turn off car, and wait > 30 seconds for the dash to turn off completely
-
Turn on car to accessories only (don’t start)
-
Set clock through Infotainment
-
Codes/dash warnings should be gone