If you are here, you must have a larger issue with your Alfa Romeo Giulia that requires a more technical approach to clearing warnings and codes. If you have not done so already, read through the Disconnected your battery; now you have warnings?! (Stage 1) article before continuing on. If that article was unable to get you squared away, continue on to learn about other methods of clearing your warnings or codes.
Prerequisites
- Read the article Multiecuscan (MES) Setup and Connection Timeout Troubleshooting
Tools
- Multiecuscan (MES) Windows software
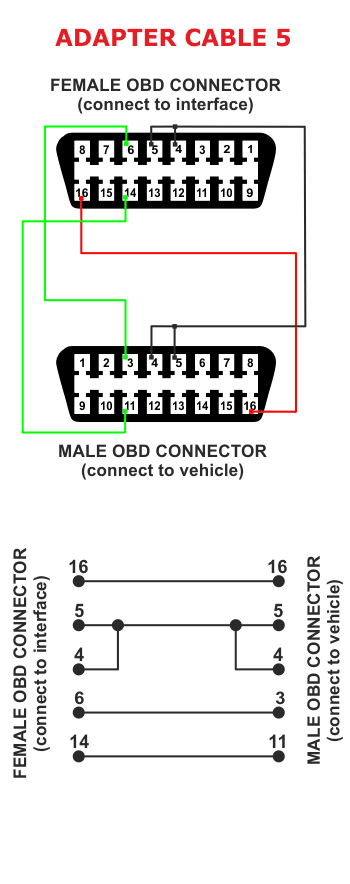
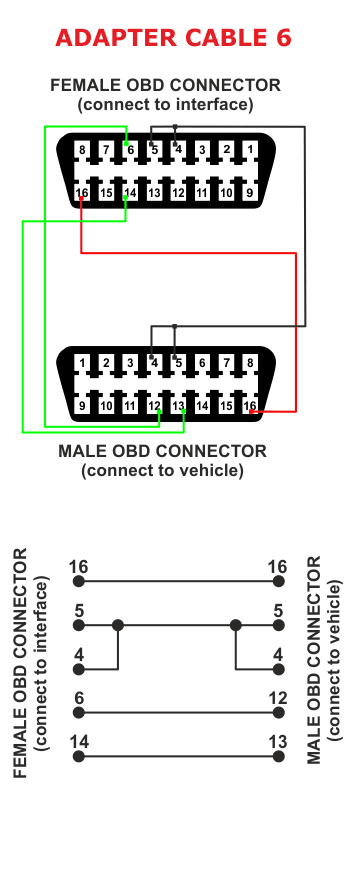
- Fiat/Alfa Romeo/Lancia Blue and Grey OBD adapter cables (A5 and A6)
Tools used in this write-up
- OBDLink SX USB OBD Scan Tool
- 6 Adapter diagnostic cable set fiat alfa multi ecu scan For Italian Cars
- Windows 11 laptop
Procedures
-
Document all warnings or errors that you are presented with on the screen.
- You may come to find that by the end of this write-up you actually do have an issue that needs to be looked into further. Take pictures, videos, notes, etc. It can all help in the future to have this documented. Include dates, weather conditions, and driving habits, and the vehicles driving behavior if any.
-
Connect your OBD scan tool to the vehicle’s OBD port.
- The OBD port is located on the left side of the steering wheel underneath the dash just below the little cubby (AKA, the shin f%^@er) that you probably had no clue even existed.
-
Turn on the vehicle, do not start.
-
Connect the OBD scan tool USB cable to your laptop and launch MES.
-
On the main screen you are presented with a list of vehicles that you can connect to. Select Alfa Romeo → Giulia 2.0 Turbo 16V MultiAir
-
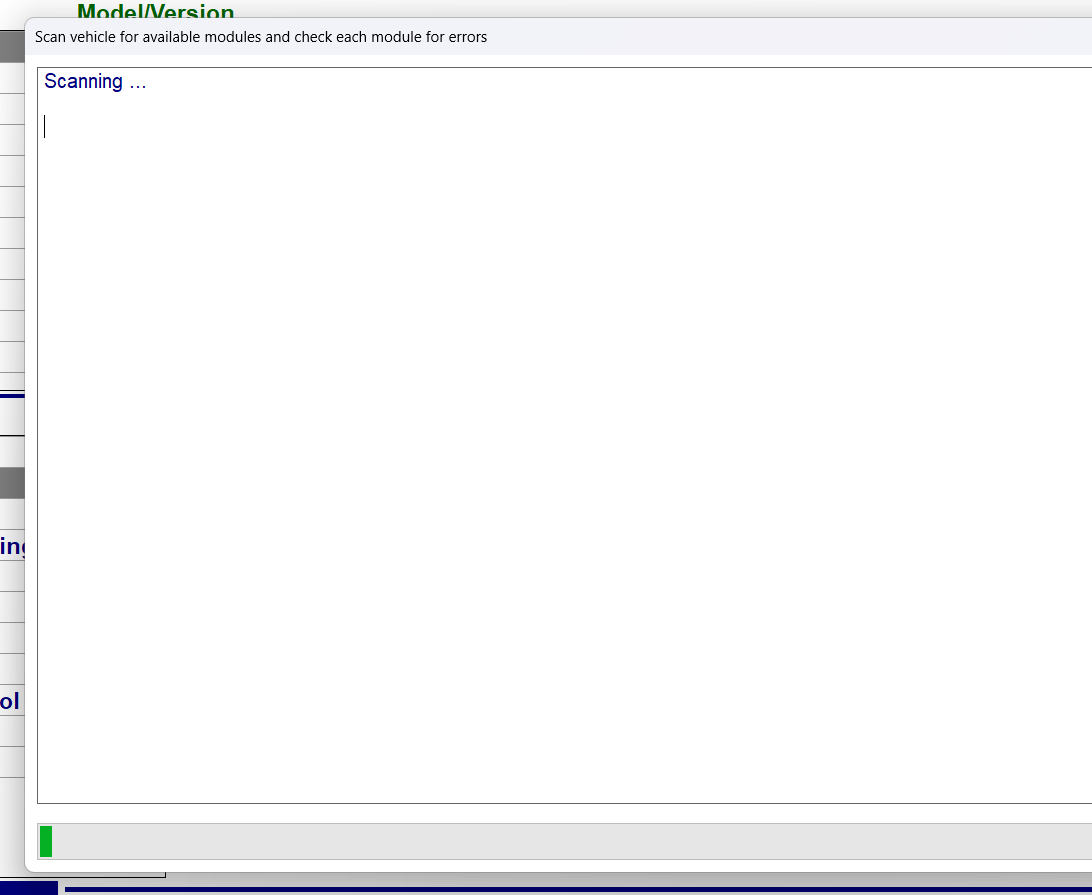
Click the Scan DTC button in the lower right. This scans for all available modules and any codes stored in those modules.
-
Save the output of that dialog using the very handy PDF button located in the lower right next to the OK button. Give it a meaningful name (e.g., 2024-05-17_Giulia_DTC_Output.txt)
-
Close the Scan DTC dialog.
-
Based on the information contained in the Scan DTC output, connect to a module that reported an error by selecting it in the System list and clicking the Connect button.
-
Follow the prompts to use an adapter cable (Grey or Blue) if instructed. Not all modules require an adapter cable to connect.
-
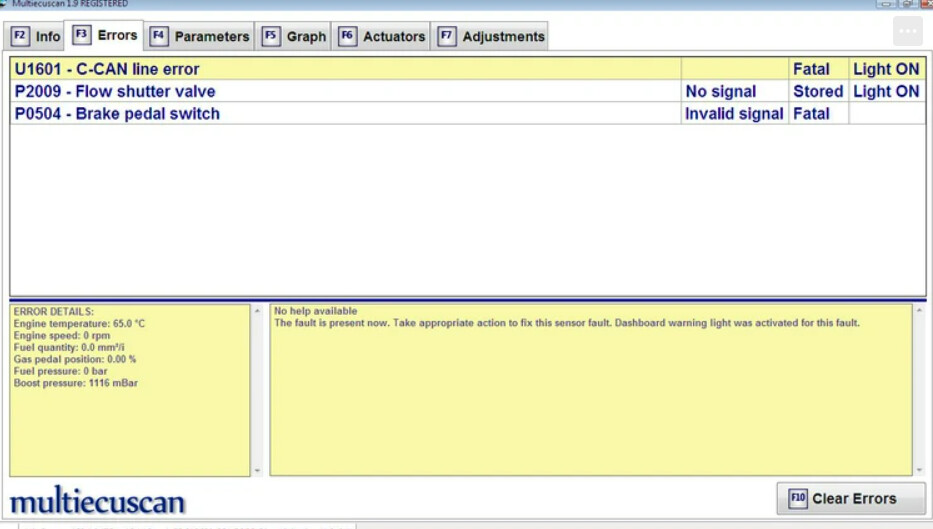
Once connected, you can remove any stored DTC’s by selecting the Errors tab and clicking the Clear Codes button.
-
Once the codes have been cleared, you may Disconnect from that module and move on to the next module that reported a DTC in the Scan DTC output from Step 6.
-
Rinse and repeat steps 9-12 clearing codes on the Errors tab for each offending module.
-
Once you have gone through all of the modules and cleared the DTC’s, re-run Scan DTC to see if they pop back up. If they do, repeat steps 9-12 until they are all cleared. You may end up in an infinite loop, so at some point, cut your losses and continue.
-
Disconnect the ODB scan tool from the OBD port and turn off the vehicle. Wait at least 30 seconds until the dash lights turn off and then you can turn on the car again.