I swapped the rear sway bar on my AWD 2.0 to a Quadrifoglio rear sway bar, this changed the diameter from about 20.5mm to 22.0mm. RWD 2.0s appear to come with an even smaller rear sway bar than AWD 2.0s, so if you’re a RWD 2.0 you may want to just source an AWD 2.0 sway bar instead of a Quadrifoglio sway bar. I’m pretty thorough/wordy so expect this to be a long read with lots of details.
Here are some part numbers I have from the project and you will want to know. Part numbers with question marks by them are guesses based on the TechAuthority parts manual or eBay used parts listings and not verified personally.
Hardware
Mopar 6511458AA, Alfa ??? - End Link Nut (M12x1.75, locking, flange) - Not supposed to be reused, order new ones (x4); they’re cheap.
Mopar 68323452AA, Alfa ??? - Sway Bar to Crossmember bolt (M8x1.25, T40 drive, approx 33mm of thread) - “can” be reused, included for size reference
YOU WILL WANT: (qty 4) M8x1.25, 30mm length, full-thread, Class 10.9 Hex-head Flange Bolt. Preferably zinc-plated. Reinstalling the original bolts, at least the frontward ones, is basically impossible. Hex head will let you use a standard box wrench to install and tighten the bolts.
Rear Sway Bars
In order of (from what I can tell) smallest to largest:
Mopar 68317199AA(?), Alfa 505417820 - Giulia RWD 2.0, Stelvio RWD/AWD? 2.0
Mopar 68311649AA(?), Alfa 505497780 - Giulia AWD 2.0, 2017-2018?
Mopar 68357590AA(?), Alfa ??? - Giulia AWD 2.0, 2019+?
Mopar 68317559AA(?), Alfa 505443650 - Giulia Quadrifoglio
Mopar 68406134AA(?), Alfa ??? - Stelvio Quadrifoglio? - Considering the 2.0 rear bar is the same this probably fits Giulias as well
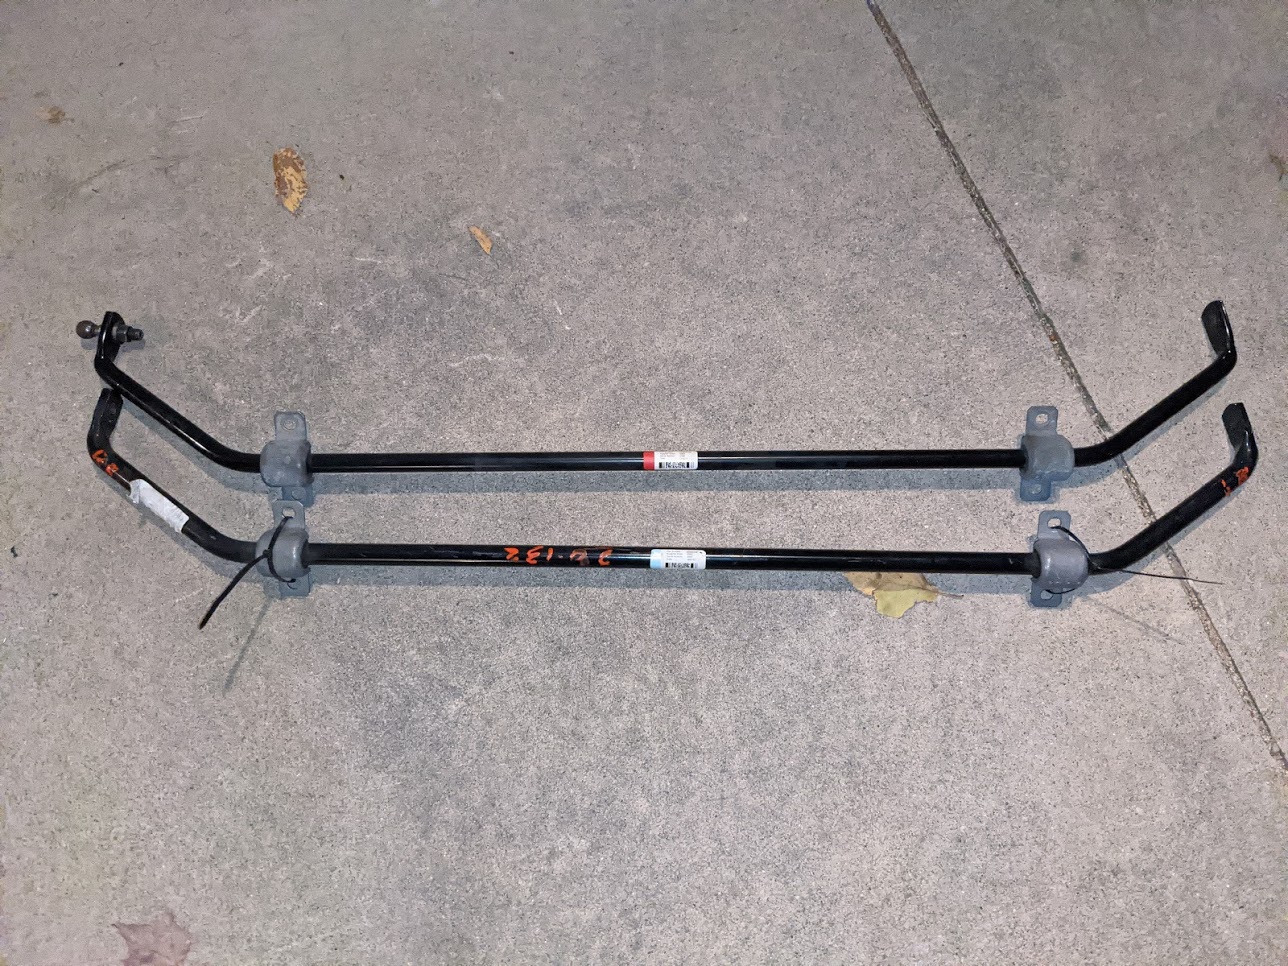
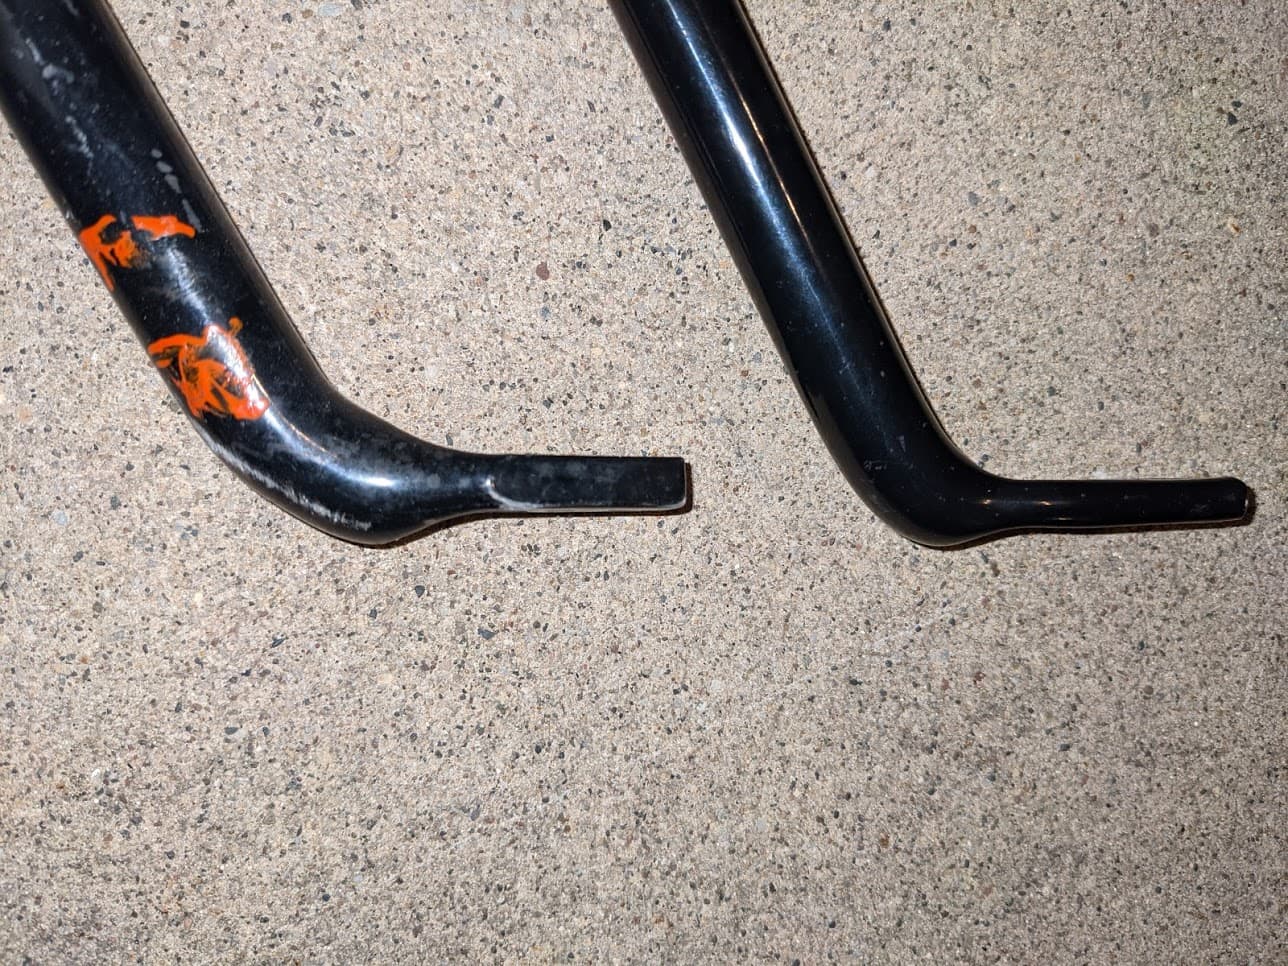
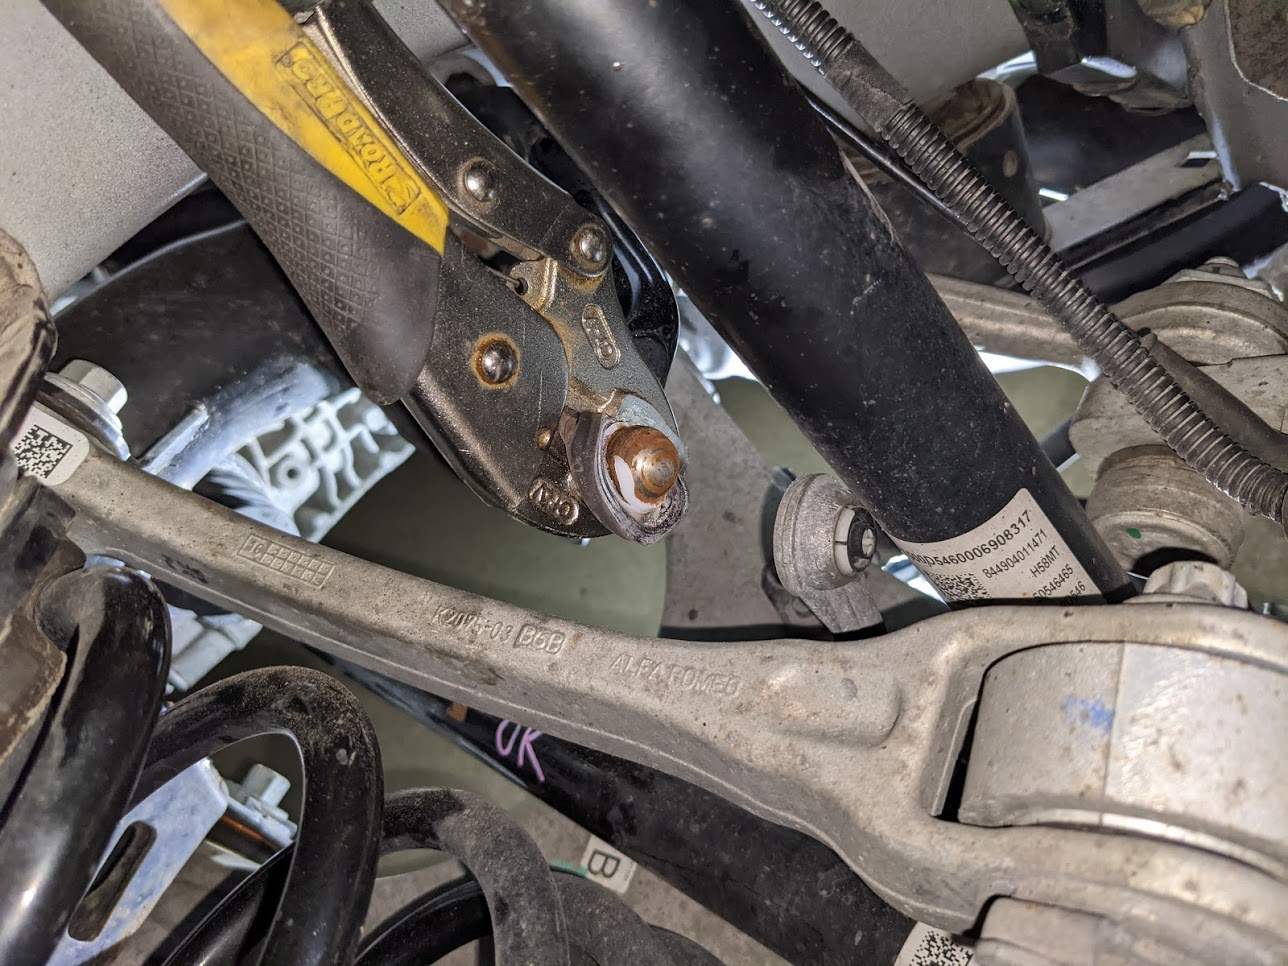
Below are some comparison shots of my 2017 AWD rear sway bar and the QF rear sway bar.
End Links
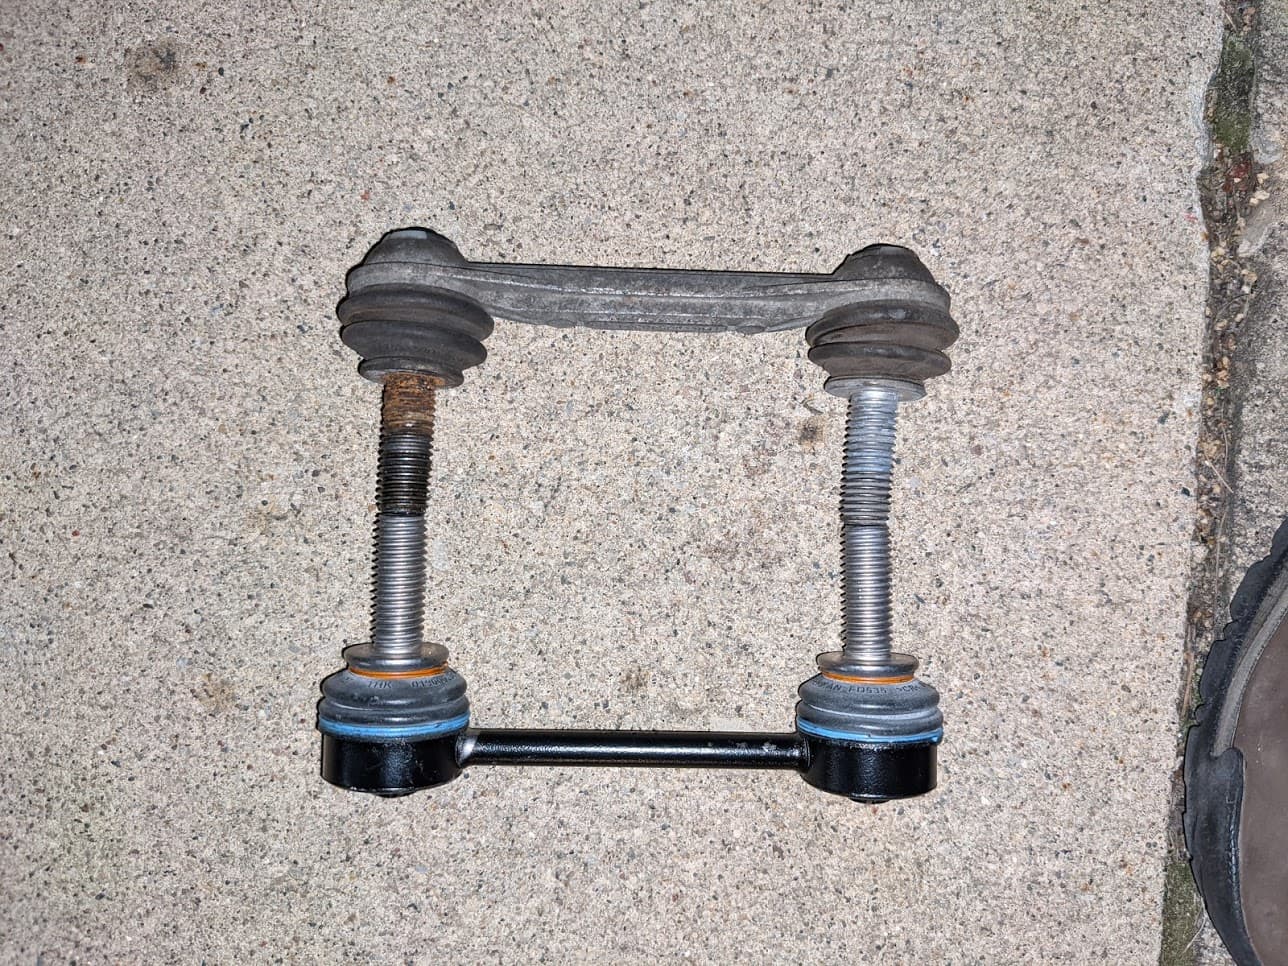
There are two-part numbers here, one is early '17 production and the other is used thereafter. They’re interchangeable by size but constructed differently. I recommend just having a new matching set on standby in case you end up needing them or just installing them regardless.
Mopar 68311986AA, Alfa 50543807- Early '17, Black (What I installed)
Mopar 68357260AA(?), Alfa 50548354 - Later '17 and up, Silver/Bare (What I removed)
Based on construction I’m not really sure it matters which you get. The grease cups on the later revision do not have bands on the ends, and there was notable corrosion on one of the ball studs of the late revision parts I removed. The later revision does look stronger, but the early revision isn’t exactly unusual for rear sway bar link construction. My suspicion is the change was necessary for the Stelvio in case people go climbing rocks with it or something, and standardizing the part across both models made more sense.
HOW-TO
The service manual will tell you to remove the rear subframe to remove the rear sway bar. This isn’t necessary. Not removing the subframe makes access to the sway bar bolts challenging but it’s not impossible. The bolts for the rear sway bar are socket cap bolts, T40 bit. The good news is the torque spec is very low, just 15 ft-lbs (20 Nm).
1: Raise and support the rear of the car. You will need to remove both rear wheels. The way I did this was: set the parking brake, remove the metal shields by the left and right rear lift pads, use a floor jack to raise a side and position a jack stand on the frame rail (or whatever you want to call it on a unibody car) just slightly towards the rear than where the lift pad is.
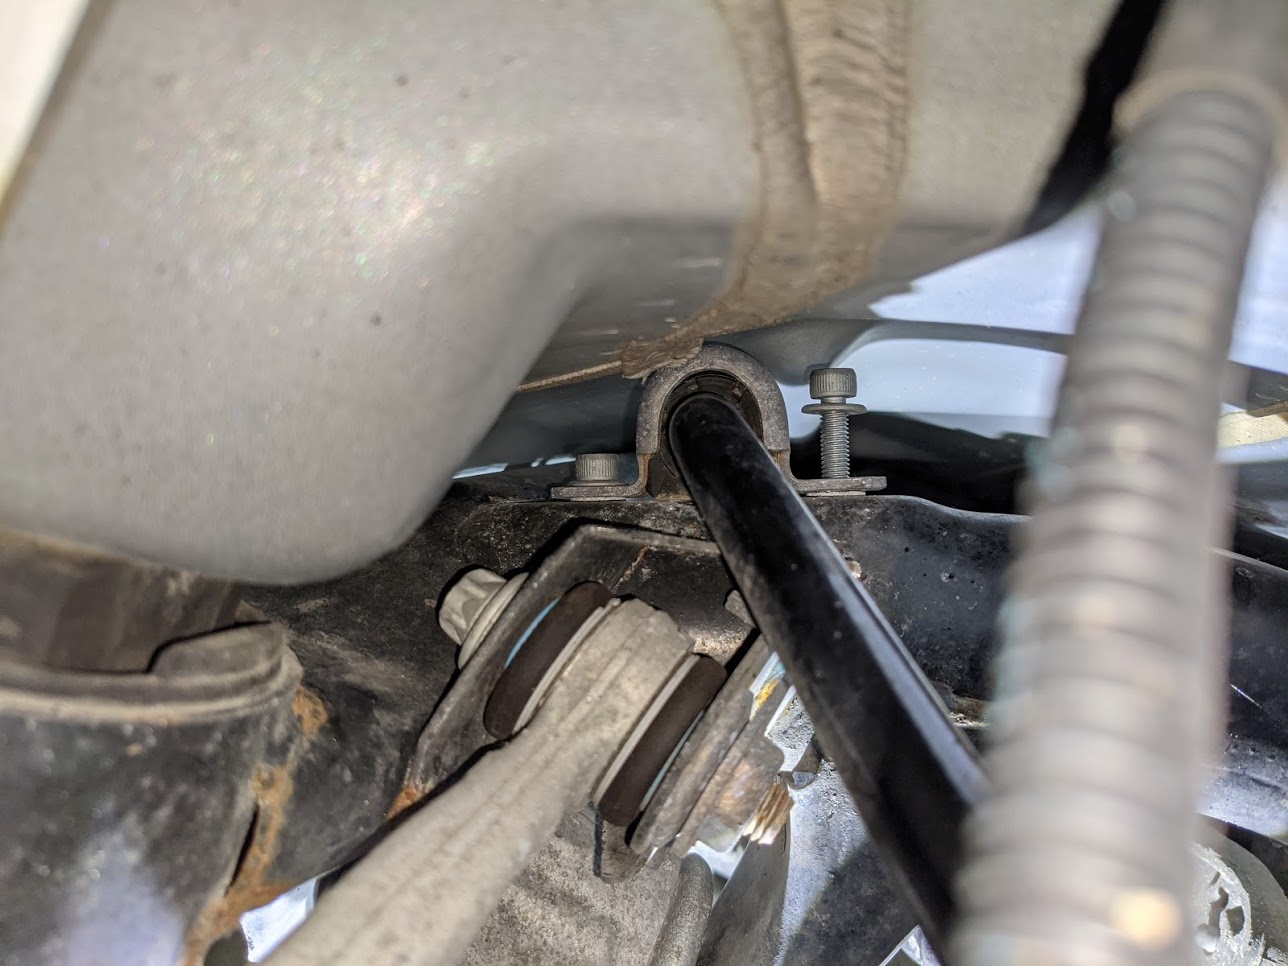
2: Loosen the rearward-facing sway bar mounting bolts (T40), but do not remove them. Just crack them a half turn loose. You have more access to these bolts when the suspension is drooping and rotating the sway bar down with the end links still connected. If you don’t have a T40 bit you can fit in there, alternative options are vice grips or (if you’re careful and the bolts aren’t corroded in place) a 7/32 allen wrench.
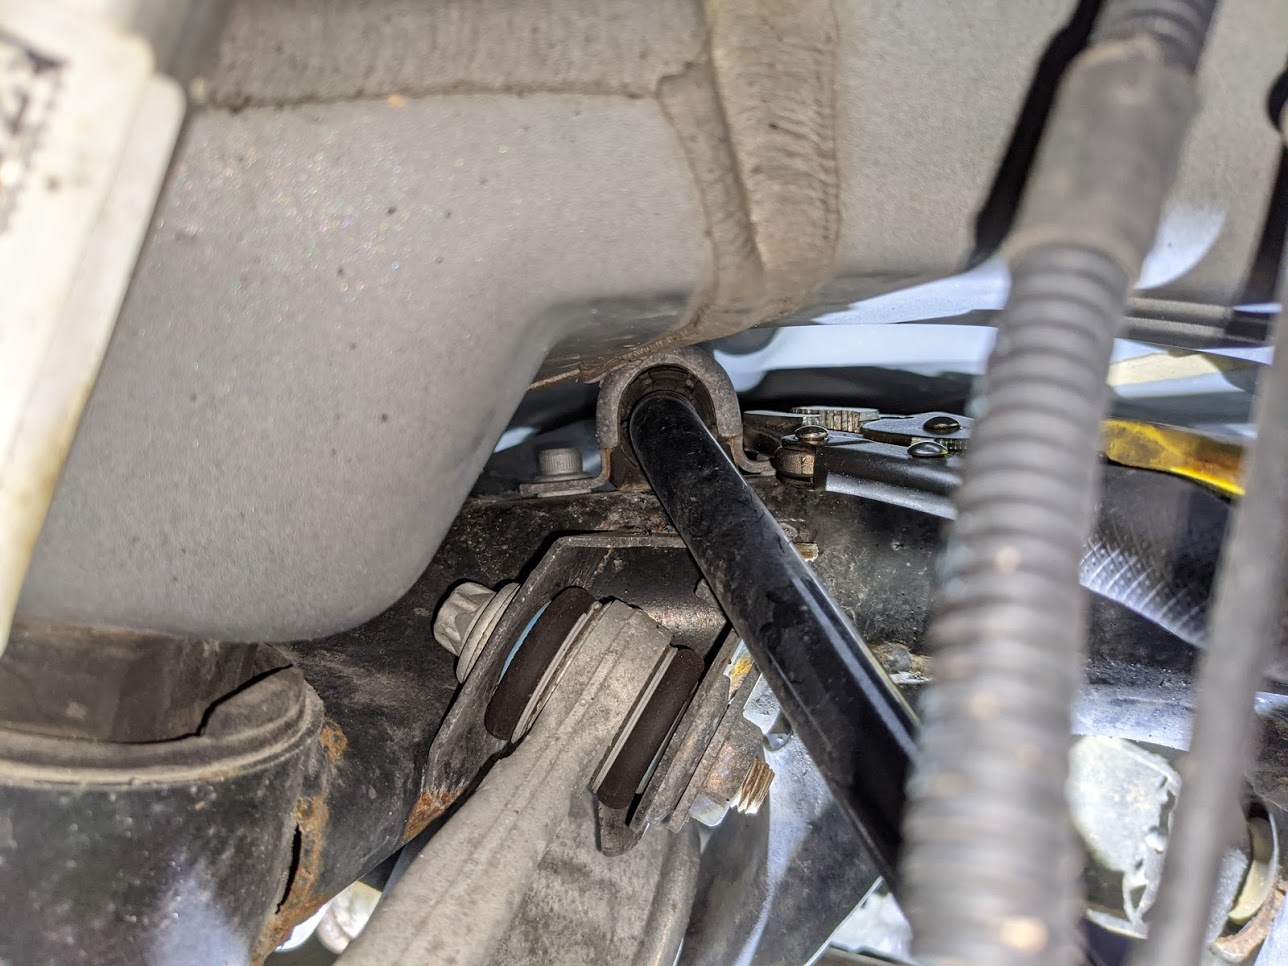
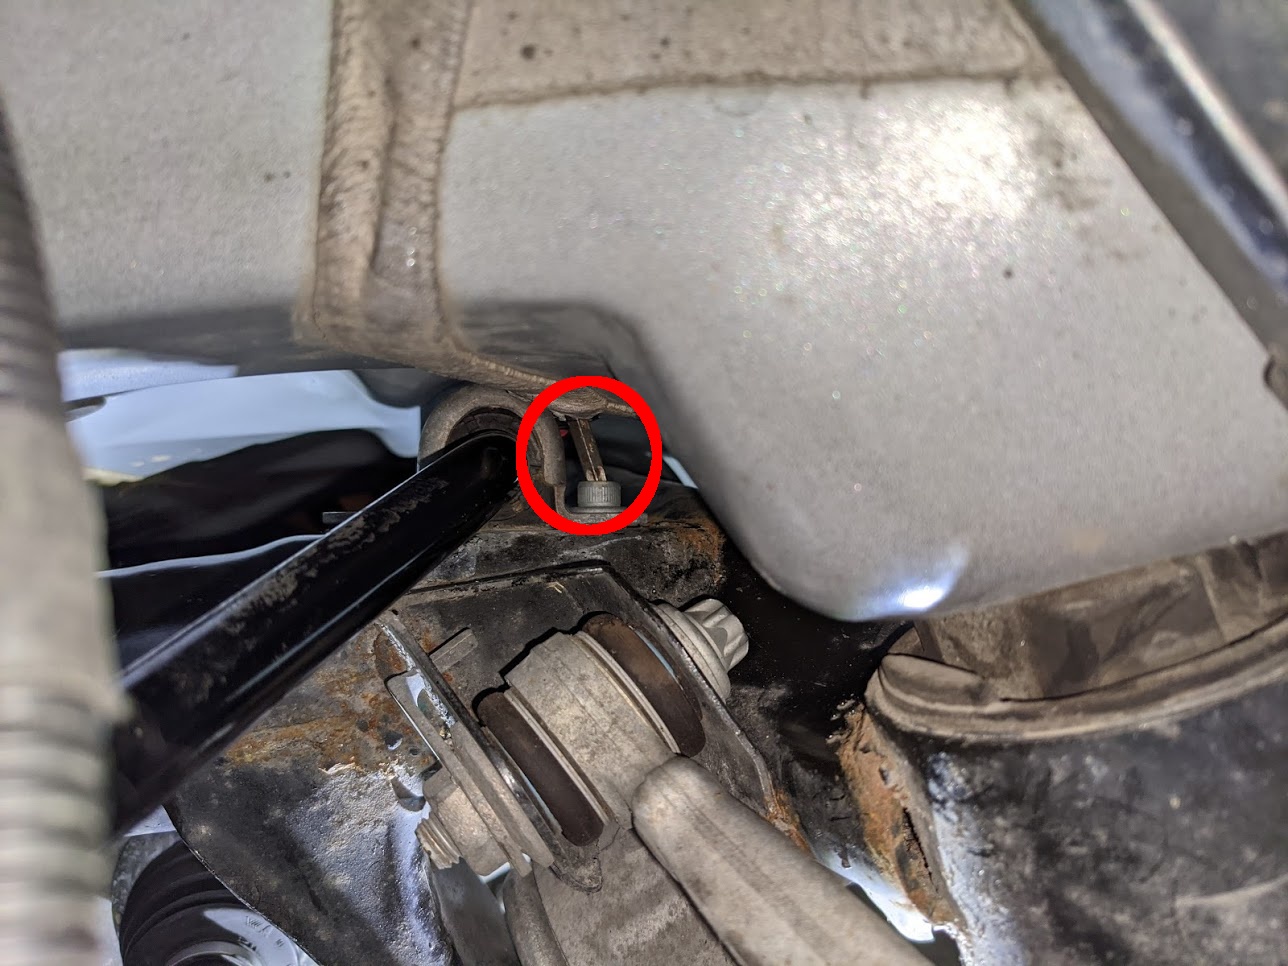
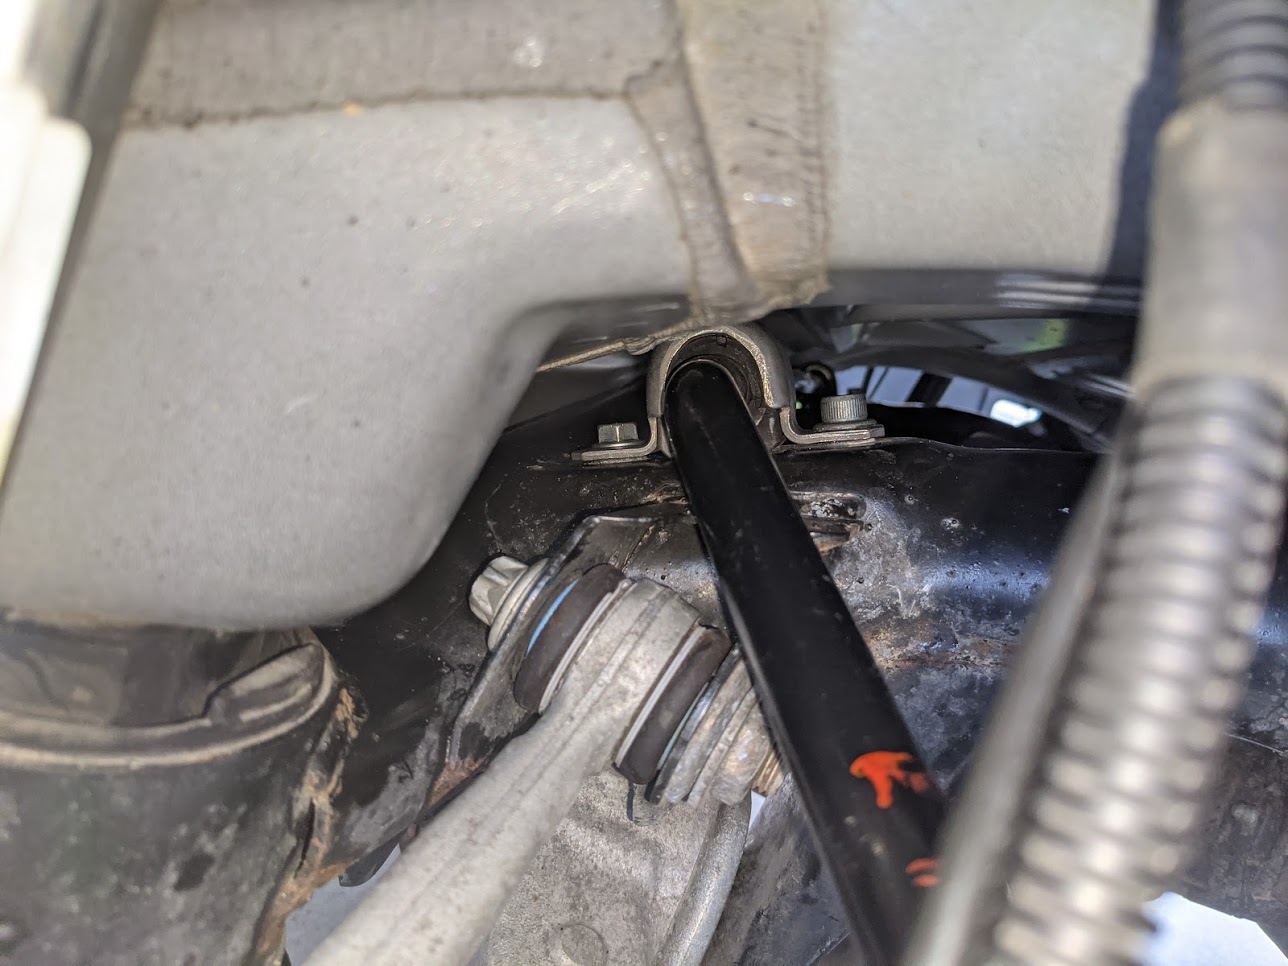
3: Remove the upper nuts on the rear sway bar end links (16mm; most 5/8" sockets/wrenches will also work). If you can fit a decent impact gun on them it’ll probably make quick work of it, otherwise hold the ball studs from turning with a T40 socket and use a standard wrench or pass-through socket to remove the nuts. I found my small 12V impact was able to help loosen the crap up inside the nut to make removal easier but it wouldn’t just rip the nuts right off. If you’re planning on replacing the sway bar links, you can cut the grease trunk and hold the stud with vice grips to get a big socket/breaker bar on the nuts. When removing the second end link, jack up the suspension at the bottom of the knuckle to normal ride height. The sway bar is preloaded upward by the non-serviceable bushings, and is being pulled down by the end link when the car is lifted. When messing with the remaining end link the ball stud can pop out of the link and you will be forced to replace it; you might jam up your tools or your hands pretty good from the result too. (see attached image). Just rotate the end links downward for now, even if you’re replacing them. It’s easier to remove the lower nut with the rear sway bar out of your way.
4: Finish removing the rearward-facing sway bar mounting bolts. You might be able to just remove them with your fingers if you loosened them up ahead of time.
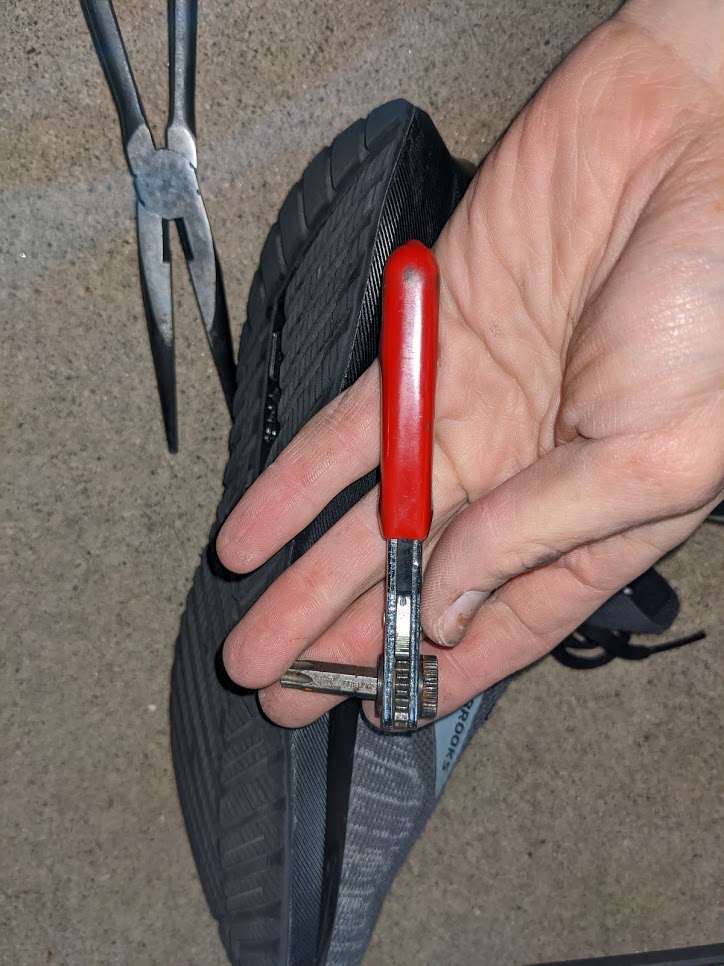
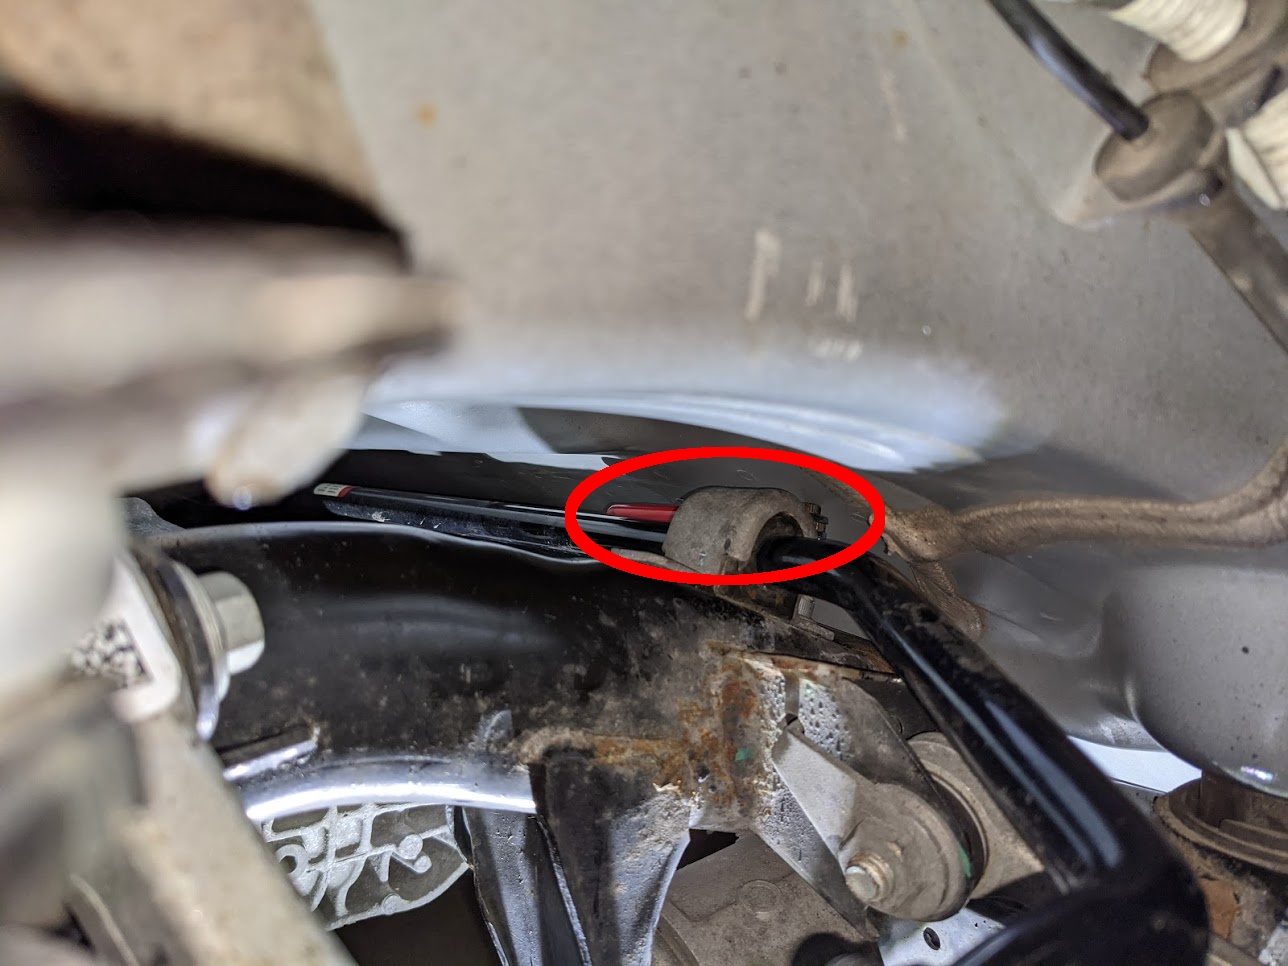
5: Remove the front-facing sway bar mounting bolts. Start with the right side, it has slightly more access. Your options here are pretty limited. Long narrow vice grips might work. I had to use a 1/4" (6.35mm) T40 bit in a stubby socket wrench made just for 1/4" hex drive bits. Expect to spend a lot of time on these. For the left side I needed to cut my bit to be even shorter. This is by far the hardest part of the project. Tip: Consider stuffing some paper towels above your tool to apply some downward pressure for you so you don’t strip the bolts.
6: Carefully slide the rear sway bar out.
7: If you’re replacing the end links, remove the remaining nuts now. Install the new links to the lower suspension arm, torque the NEW nuts to 74 ft-lb (100 Nm). I was not able to get a torque wrench on these while preventing the ball stud from turning (yes I have crows-foot wrenches and so on, there’s just not access for them). My solution was to get it as tight as I could with a box wrench/T40 helper and then stick just a torque wrench and socket on the nut. If you keep going eventually it should tighten the remaining 20 ft-lb or so; you can also try briefly hitting it with an impact gun and then going back to the torque wrench if it’s still not tightening.
8: Slide the new sway bar in. Install the bolts in the same order you removed them, but don’t tighten them fully until all 4 are mostly flush. I highly recommend replacing at least the front bolts with the aforementioned hex head flange bolts, good luck tightening the originals. Be careful not to cross-thread these, they should go in really easy once they’re started. I used a mix of anti-seize and grease on the threads to help (anti-seize alone can be kind of gritty rather than slick for the first few turns). The torque specification on these is 15 ft-lb (20 Nm)… I just went until my wrist clicked.
9: Attach the end links to the sway bar. You will likely need to jack up the rear suspension at the bottom of the knuckle to get at least the first side attached, if not both. Same procedure for torque as mentioned above.
10: Install wheels, lower car, test drive!
Overall I’m very happy with the Quadrifoglio rear sway bar on my AWD 2.0. The back end does slide out a bit more if it loses grip, but if you maintain rear grip the car is more on the nose, very little understeer. I am still currently on the stock 225 square tire setup, but plan on going to a staggered setup. For RWD 2.0s a QF bar may be a bit much, you probably only want to go up to an AWD 2.0 bar. Regardless of what you’re doing, when you put on a bigger rear sway bar you need to be less of a moron in rain/snow or on hot slick summer days or what have you. Don’t blame me if you spin the back end into a tree.
I picked the QF sway bar up from a junkyard for $100, I would recommend anyone doing this just check junkyards and eBay first to source the sway bar.